WhatsApp Business Account Configuration

Written by B3Networks Academy
Updated at May 19th, 2026
-
OSS/BSS Answers
Access Control Security Hub Admin Audit B3Network Master Account Channel App Contract App Customer App Discount App Edge Server File Management Finance App Invoice App Number Management Payment Portal Settings Price List Product App Release V2 SMS Gateway Supplier App Support Center Support Hub Business Hub Sales Hub Finance Hub
- App Model - Organization Management
- App Model - Communication Apps Answers
- License Model - Organization Management
-
License Model - CPaaS Solution Answers
Phone System - Admin Guide Phone System - End-user Guide Mobile App Desktop App Web Phone Omni-Channel Auto Attendant - Admin Guide Developer Hub - Admin Guide Microsoft Teams Operator Connect - Admin Guide Microsoft Teams Direct Routing - Admin Guide Contact Center - Supervisor Guide Contact Center - Agent Guide SIP Trunk CPaaS - SIP Trunk Power SIP Trunk CPaaS Fax CPaaS Hotdesking Contact Campaign File Explorer Power Mobile App Files App Campaign App
- Telcoflow
- Integrations Answers
- Updated Regulations
- Ideas Portal
Table of Contents
License Prerequisites
- Base License: Phone System
- Add-on License: Contact Center + WhatsApp
User Roles
- Owner + Admin = Supervisor
Supervisors must be assigned a Contact Center add-on license to access and set up Omni-channel WhatsApp.
- Member = Agent
Agents must be assigned Contact Center + WhatsApp add-on license to handle Omni-channel WhatsApp transactions.
Configuration
Get WhatsApp Account ID
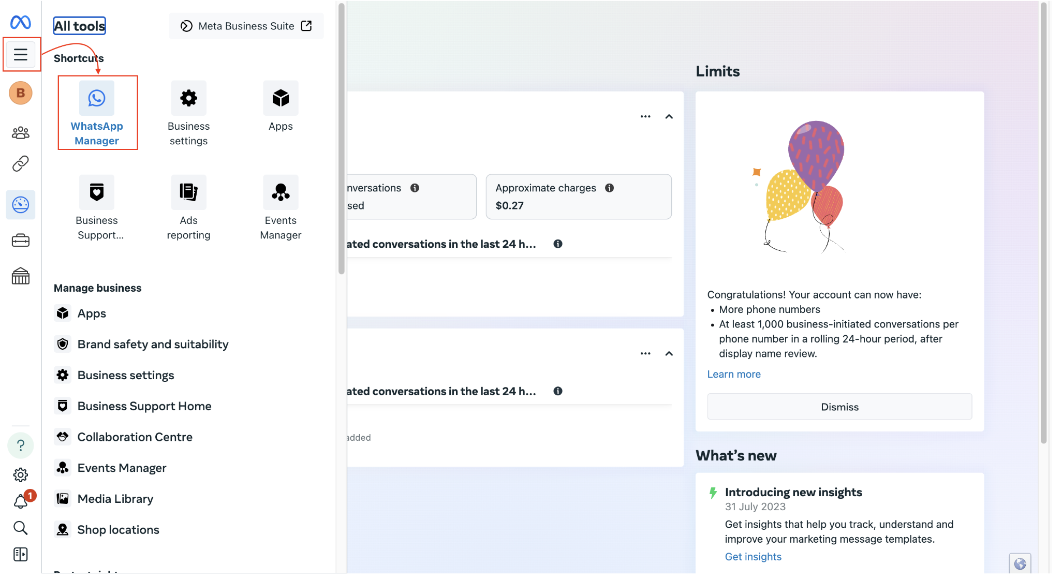
- Go to Meta Business
- Select All tools
- Select WhatsApp Manager
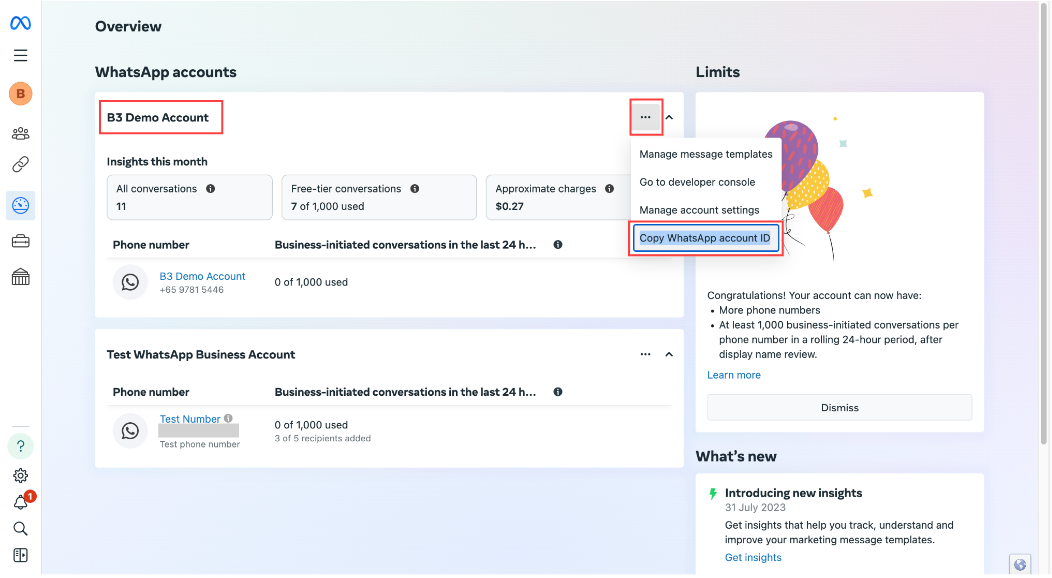
- Select the relevant business account
- Click on the 3-ellipsis icon
- Select Copy WhatsApp account ID and save for later use
Get Access Token
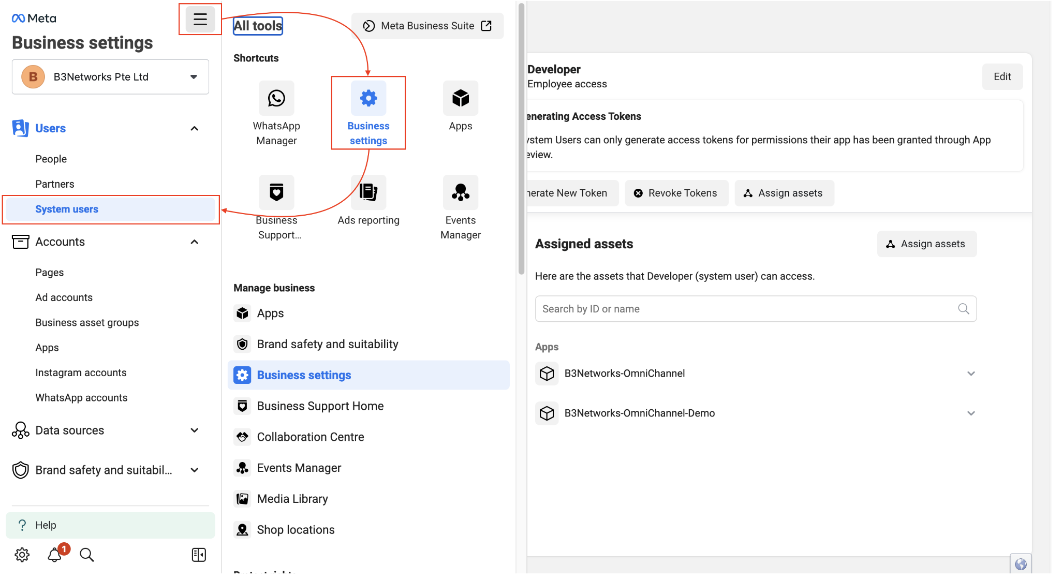
- Go to Meta Business
- Click on the hamburger menu and select All tools
- Select Business settings
- Click on System users
- Select a system user (OmniChannel)
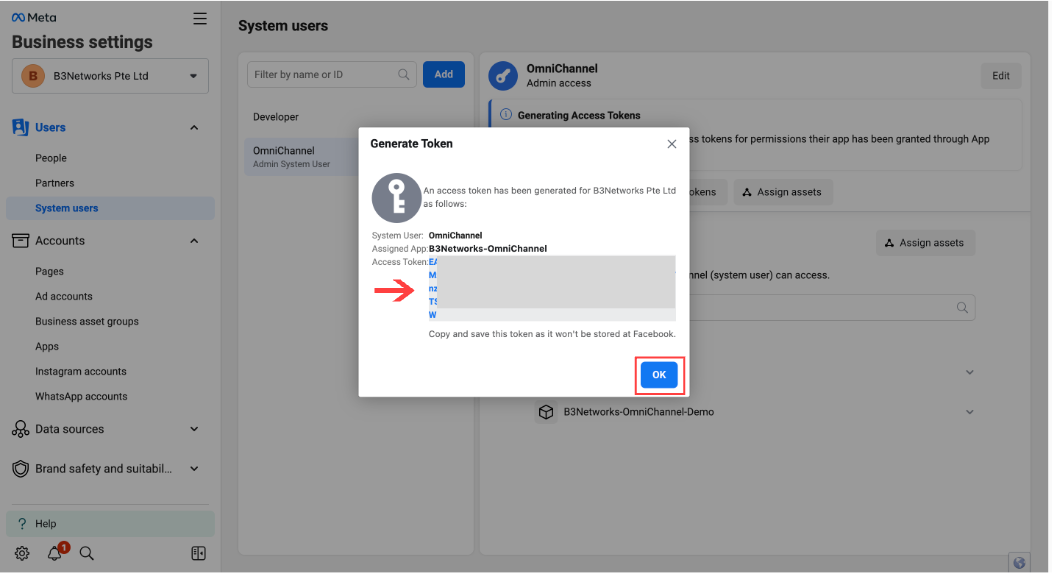
- Click on Generate New Token
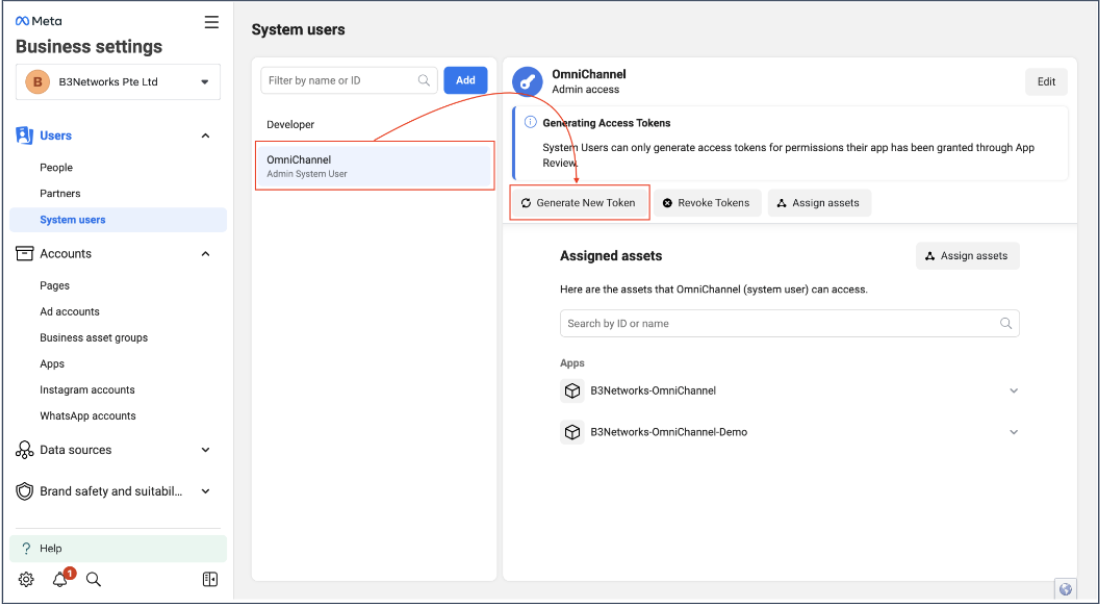
- Upon clicking on Generate New Token, a popup window will appear
- Select App
- Choose Token expiry
- Click Generate Token
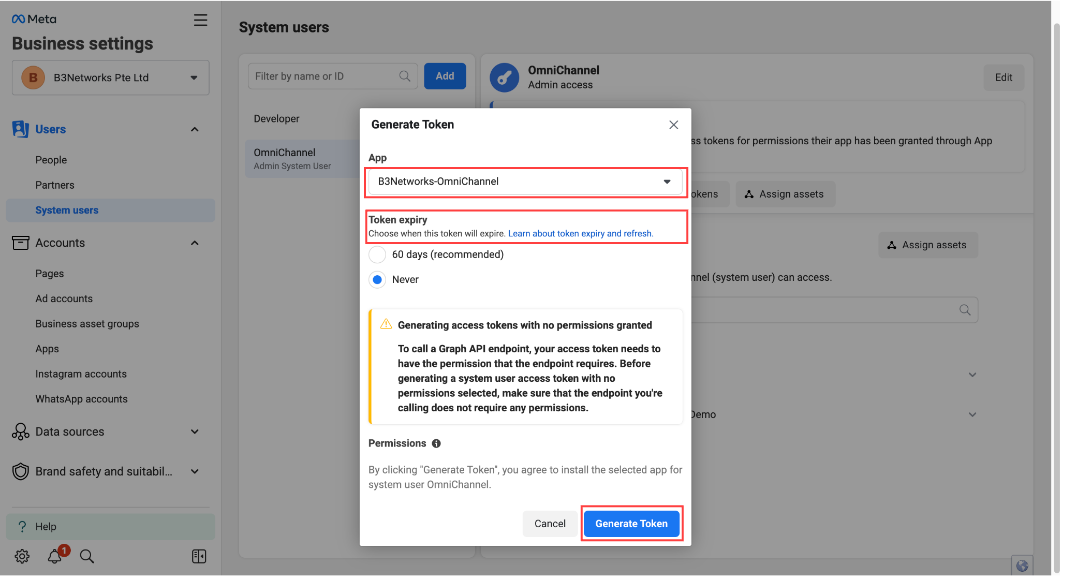
- Copy and store the access token privately as it cannot be retrieved later on
- Click OK
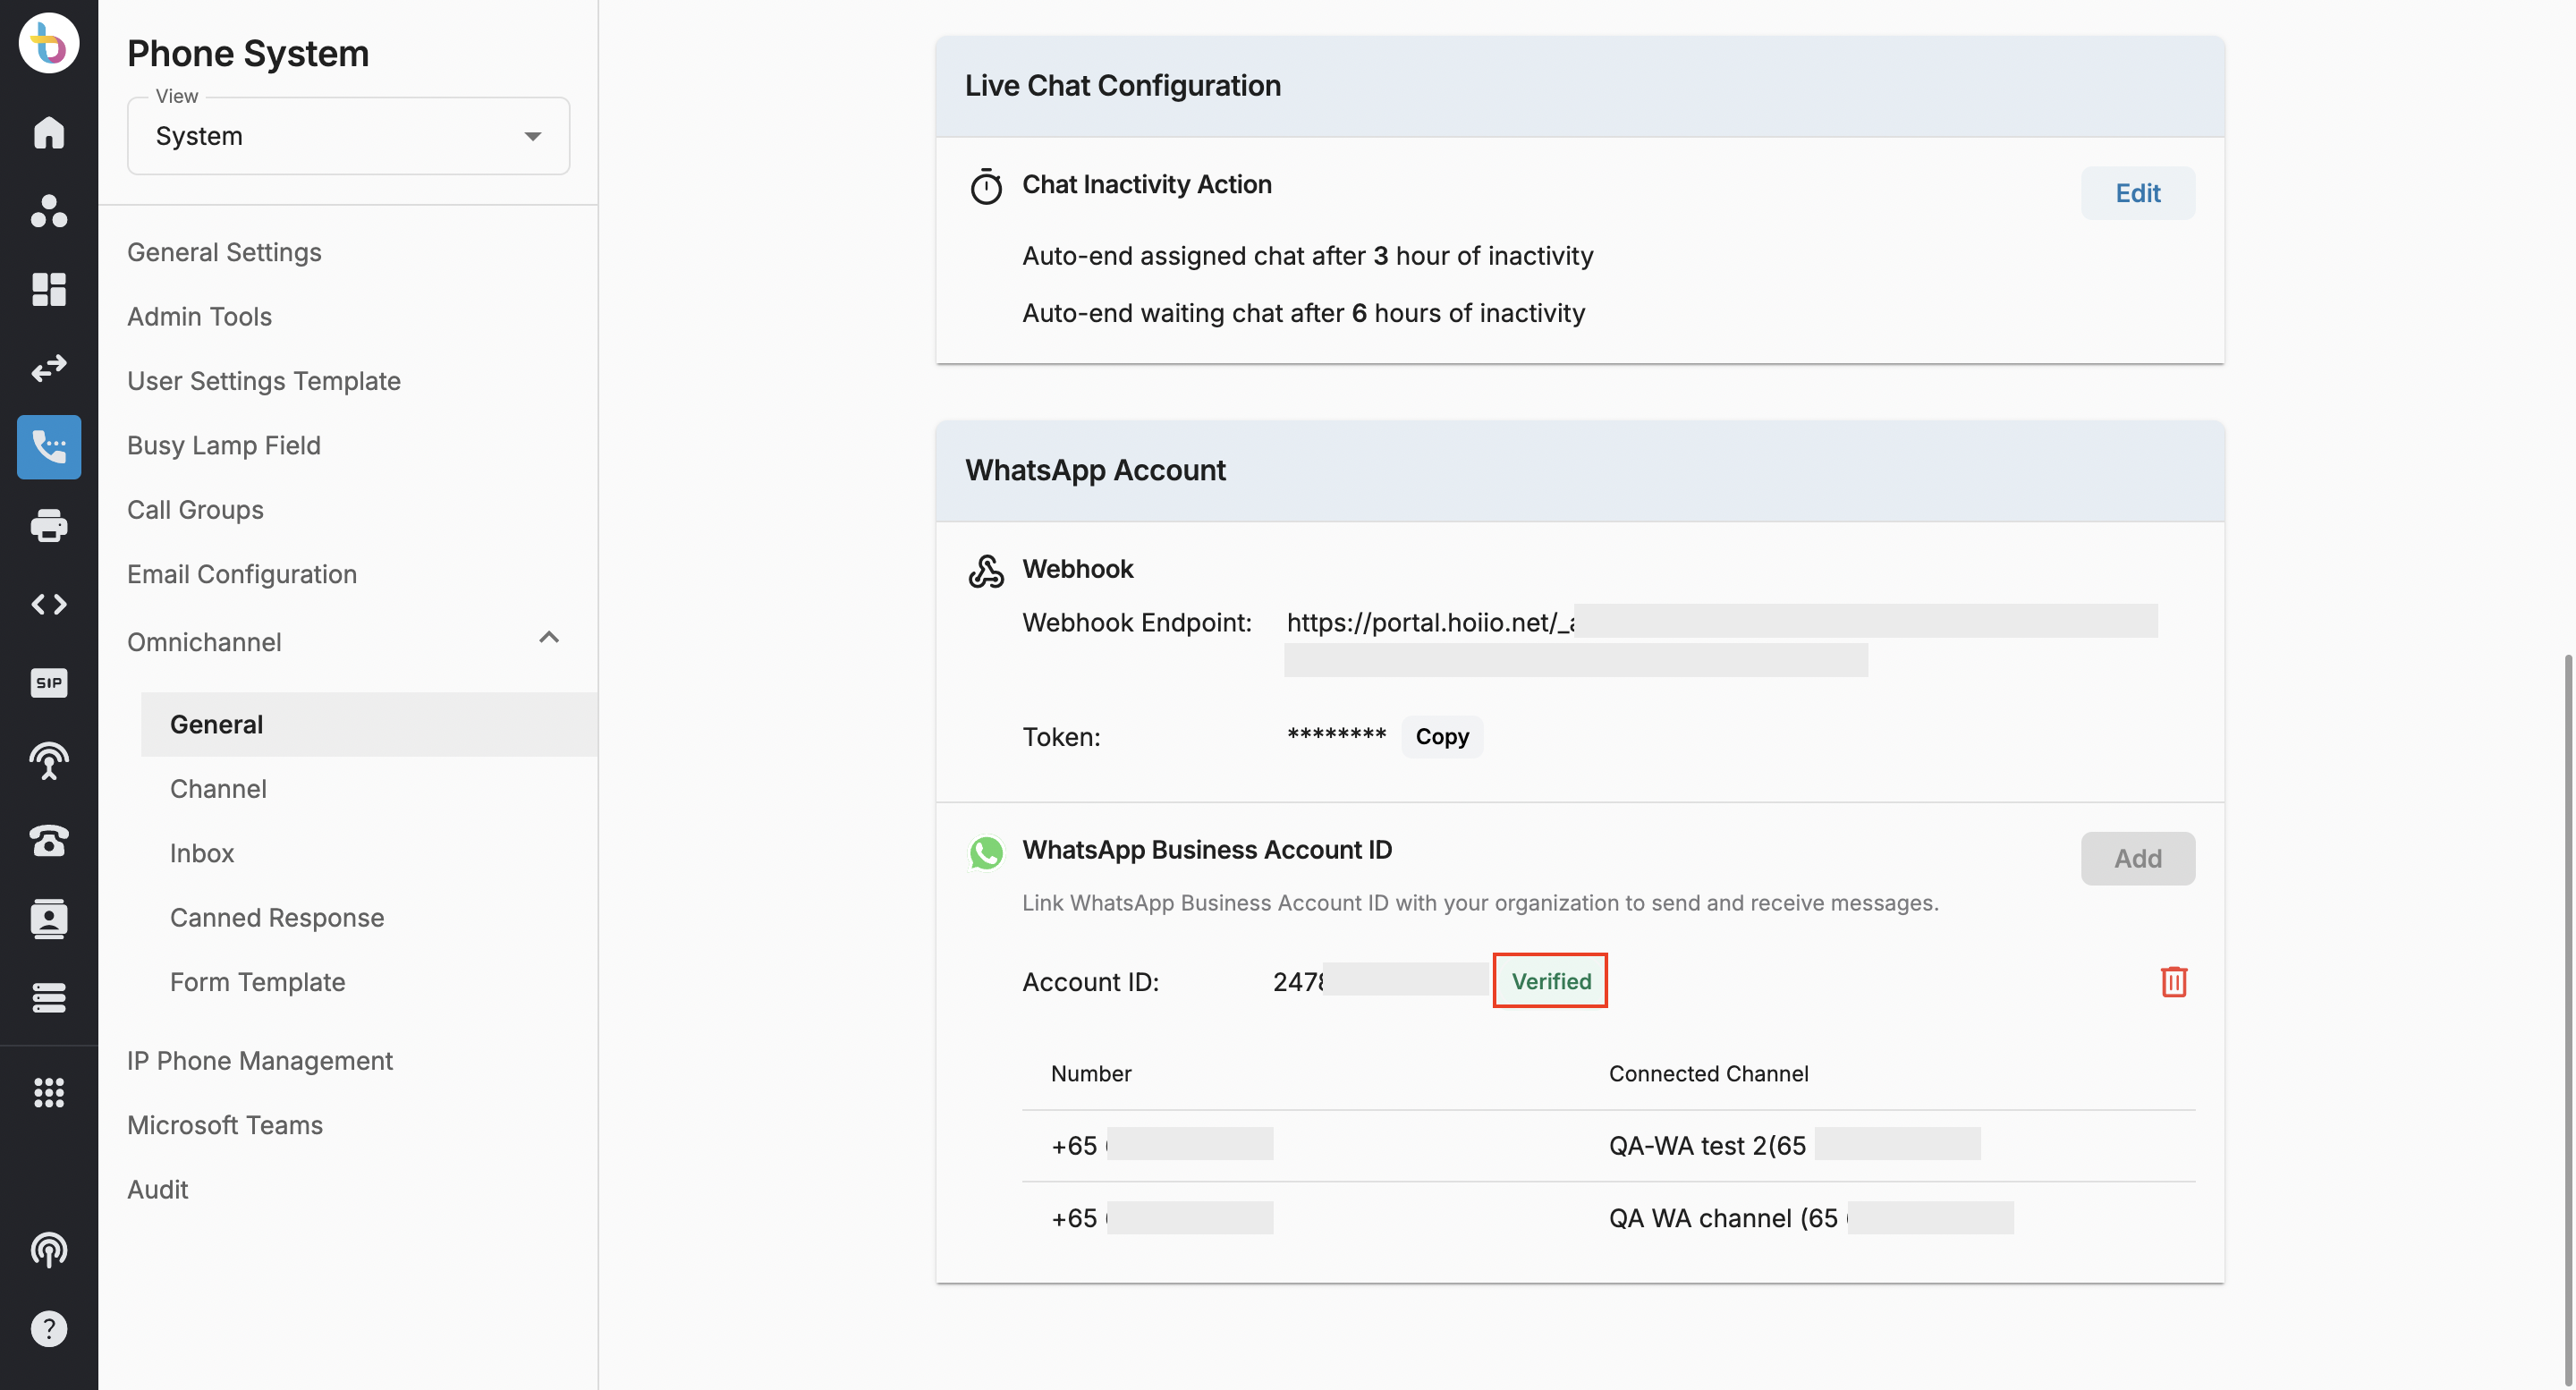
Link WhatsApp Business Account to your Organization
To link WhatsApp business account to your organization, users need to login CPaaS portal. After that:
- Go to Phone System
- Select View - System
- Click on Omnichannel - General
- Click Add to add your WhatsApp Business Account ID
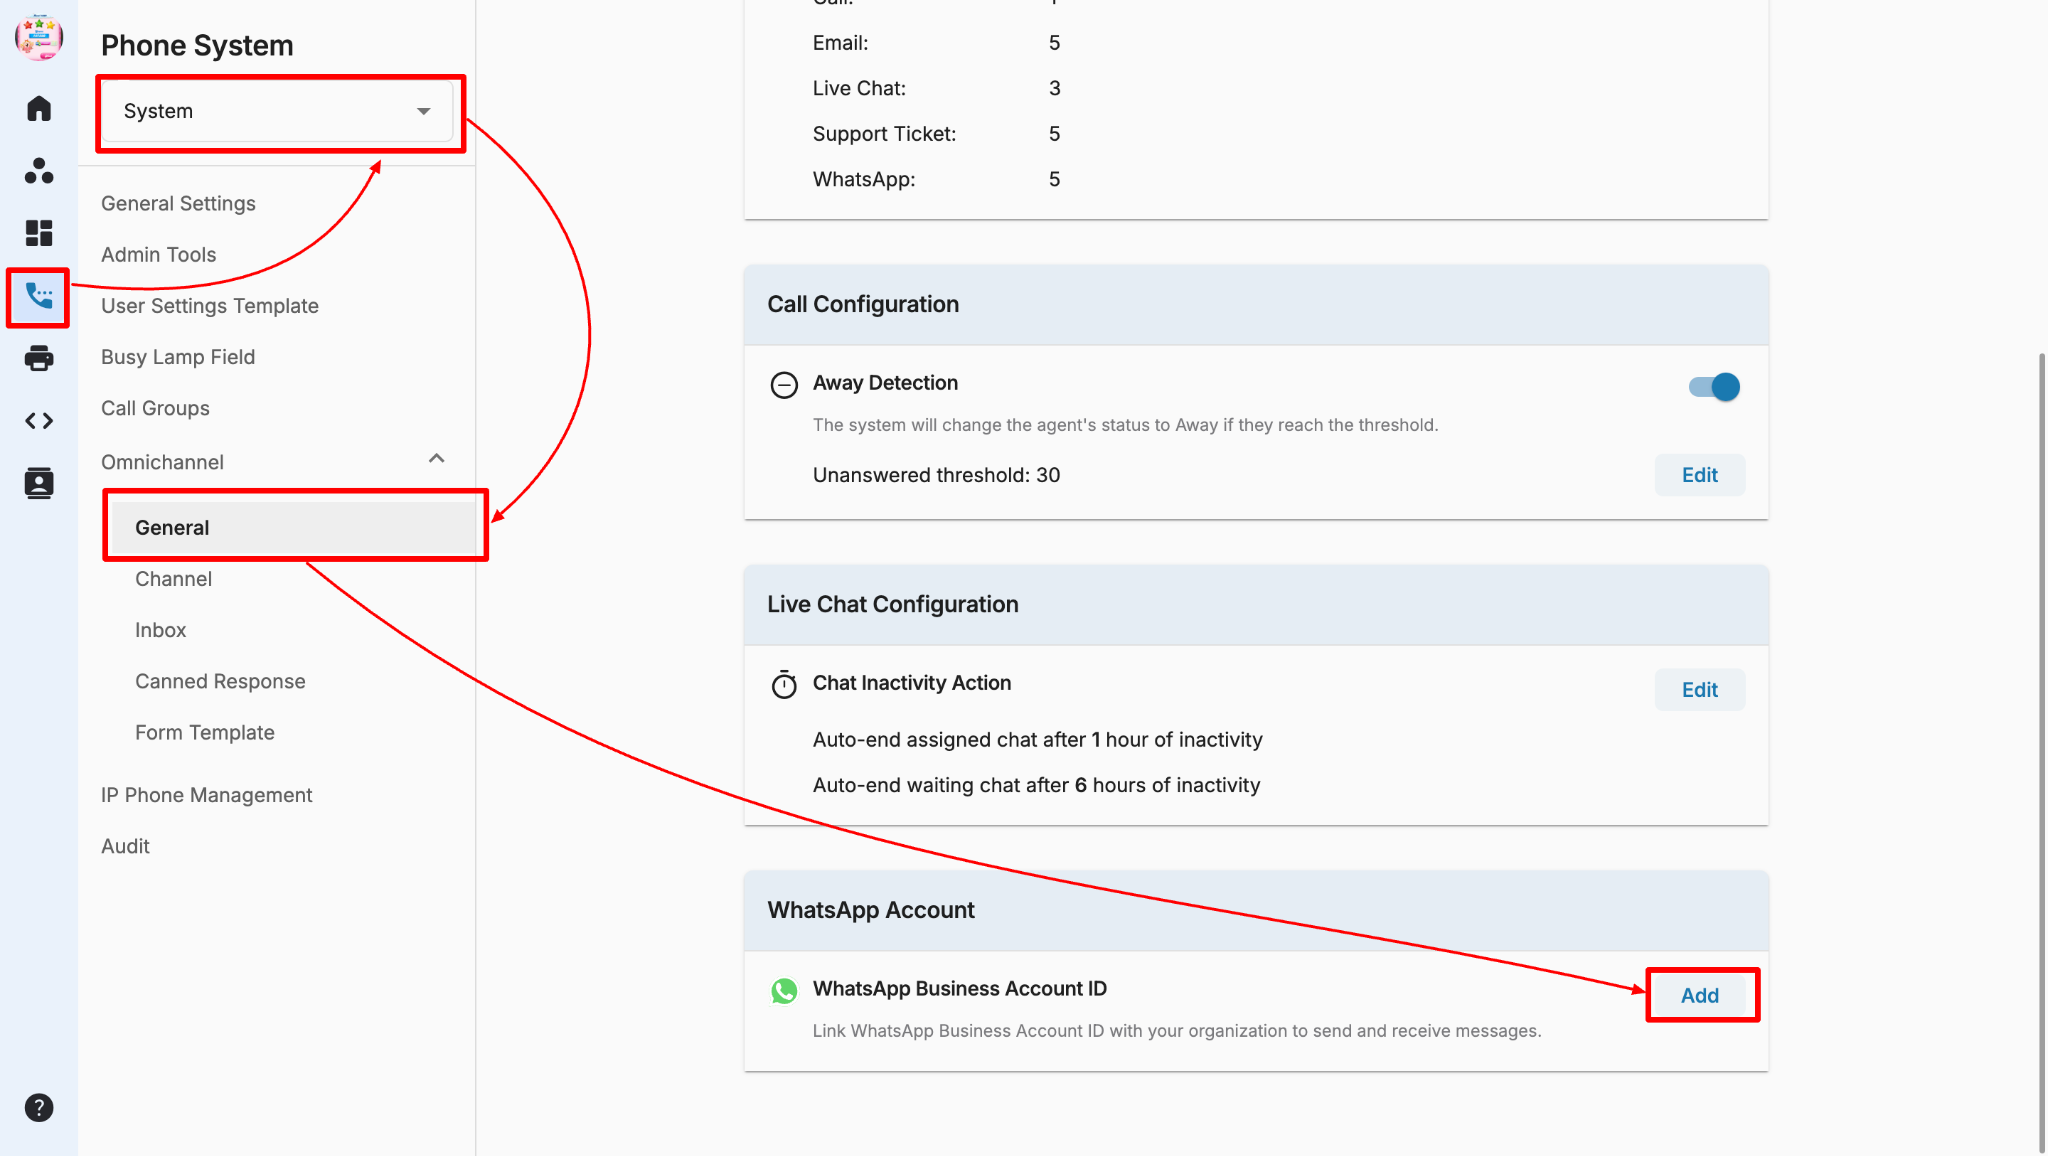
- A popup appears on the screen
- Input your WhatsApp Business Account ID
- Input Access Token
- Click Verify
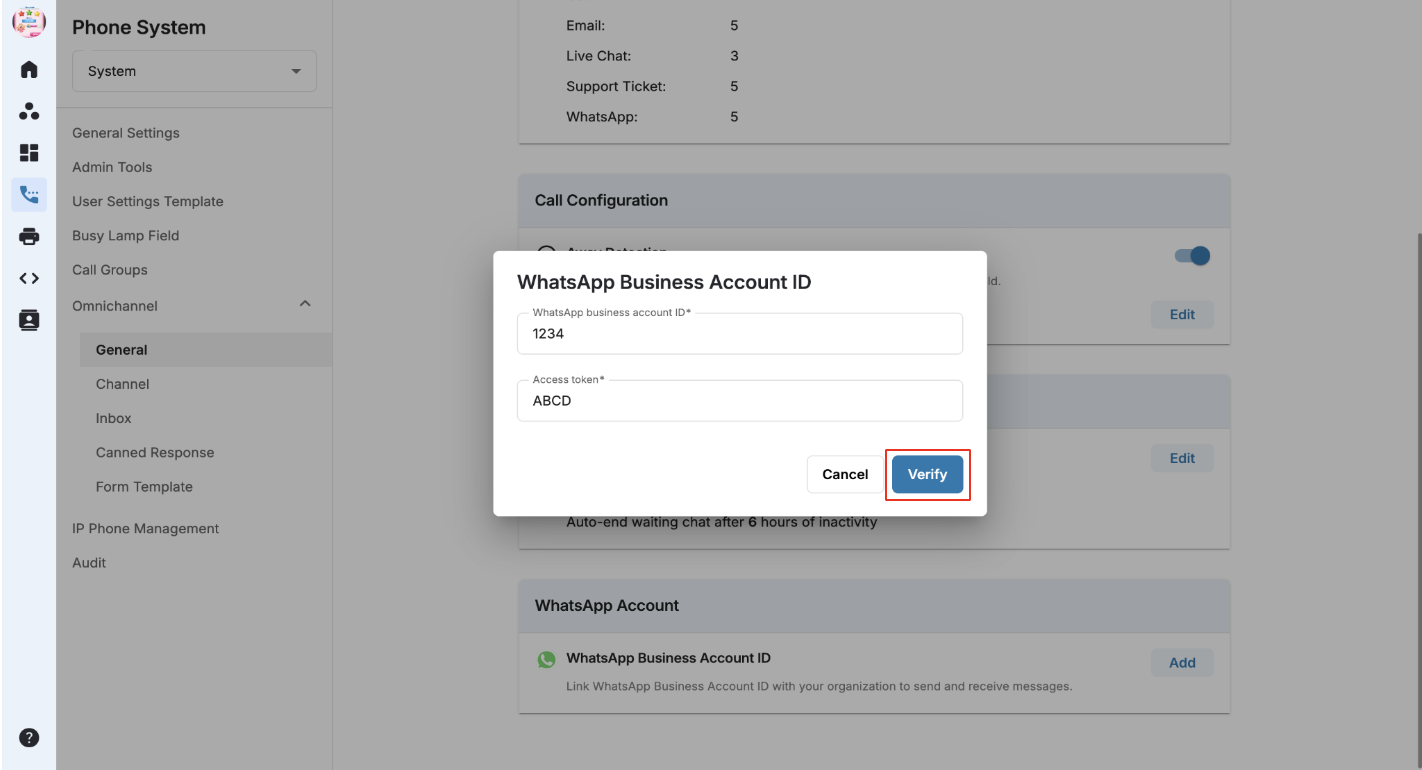
- After successful verification, the WhatsApp account will link to the portal
Link One WABA to Multiple Organizations
Users can link one WhatsApp Business Account (WABA) to multiple organizations, enabling users to share WhatsApp numbers across several organizations. However, once a number is assigned to one organization, it cannot be used in any other organization.
Example:
- One WABA possesses Number 1 and Number 2. This WABA is linked to both Organization A and Organization B.
- Number 1 is assigned to an inbox in Organization A.
- When accessing Organization B, only Number 2 is available for use.
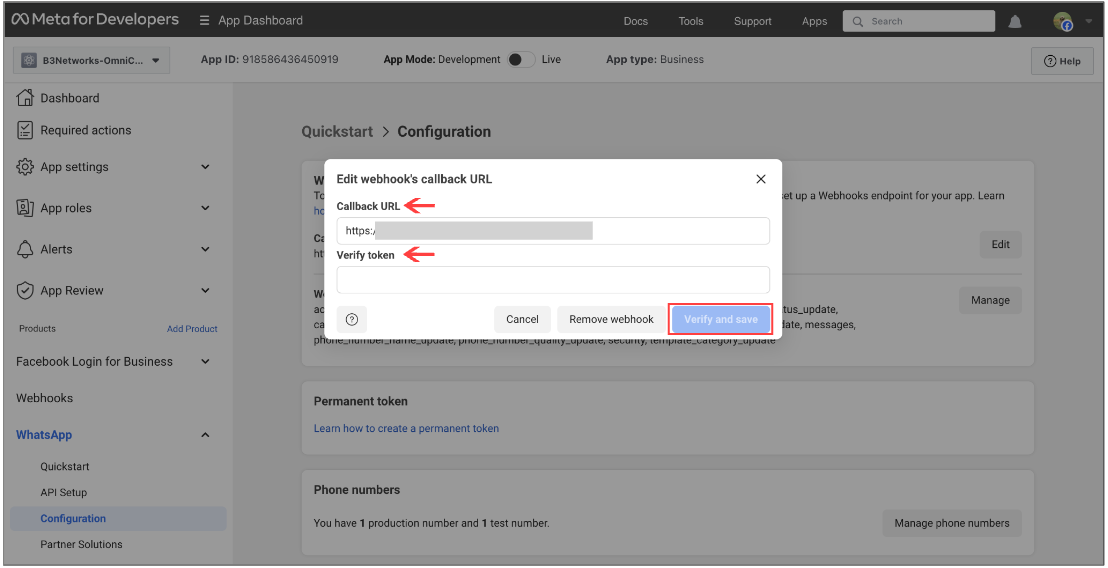
Link Organization to Meta Developer
- Go to Phone System
- Select View - System
- Click on Omnichannel - General
- Copy Webhook Endpoint and Token for later use
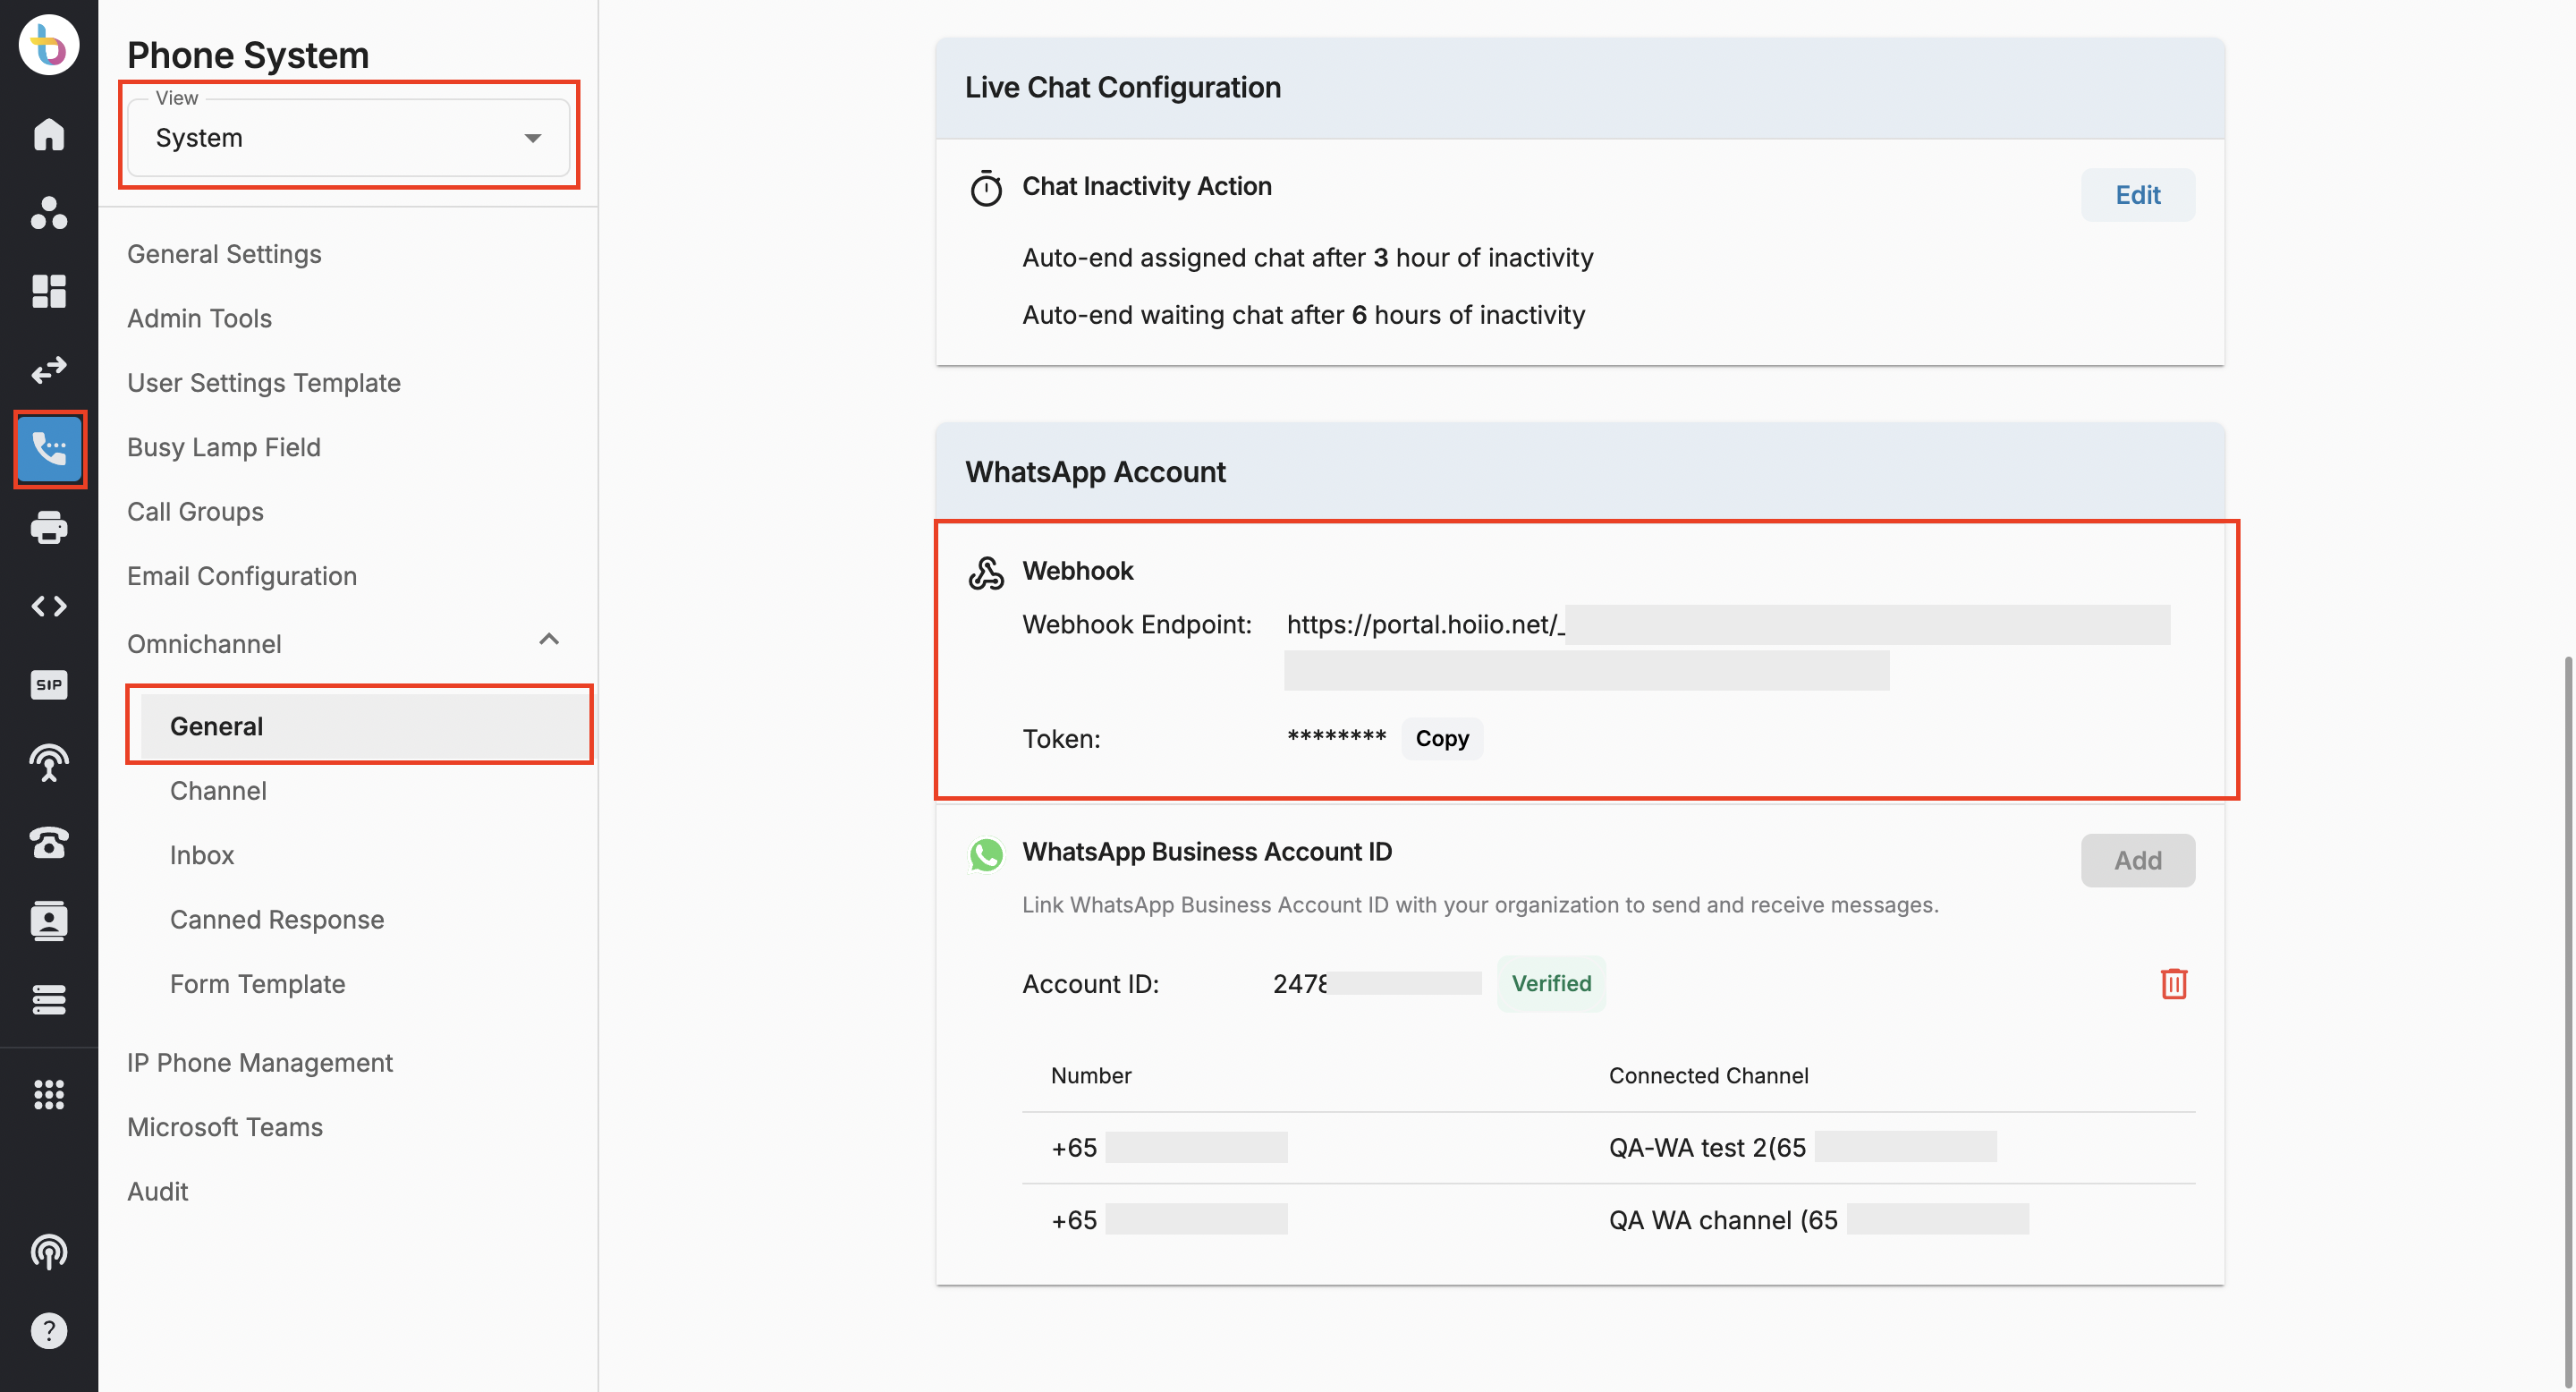
After copying the Webhook Endpoint and Token, please follow these steps:
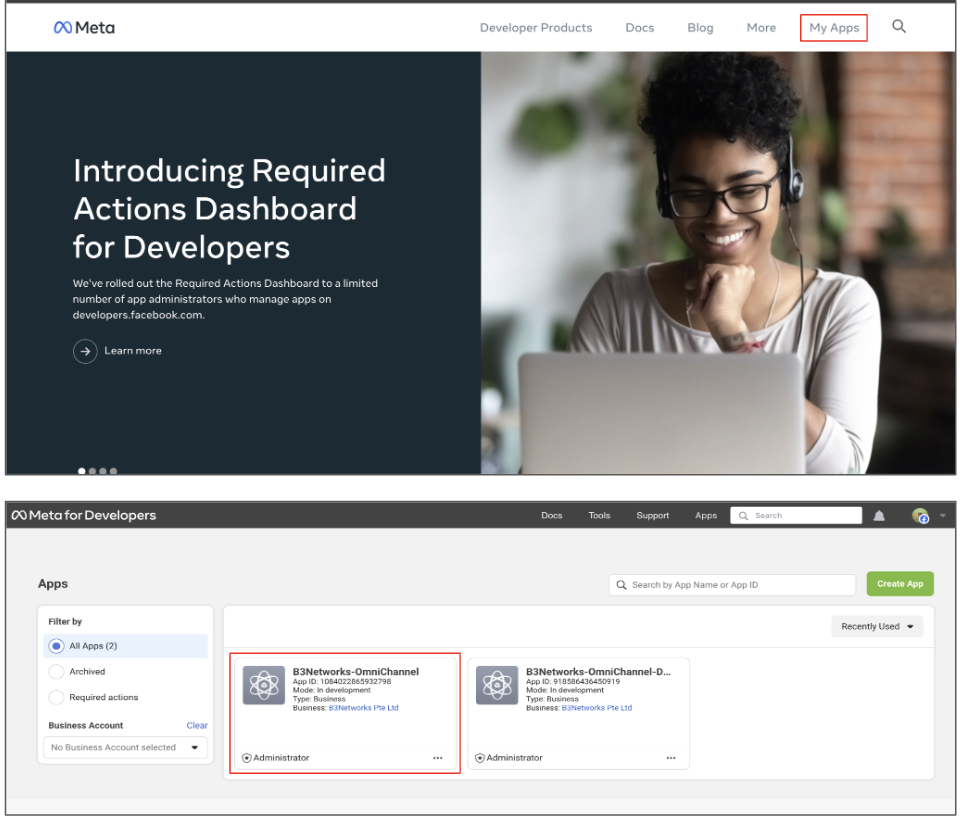
- Go to Meta Developer
- Click My Apps
- Navigate to the Apps page
- Select the App
- Click WhatsApp
- Select Configuration
- Select Edit
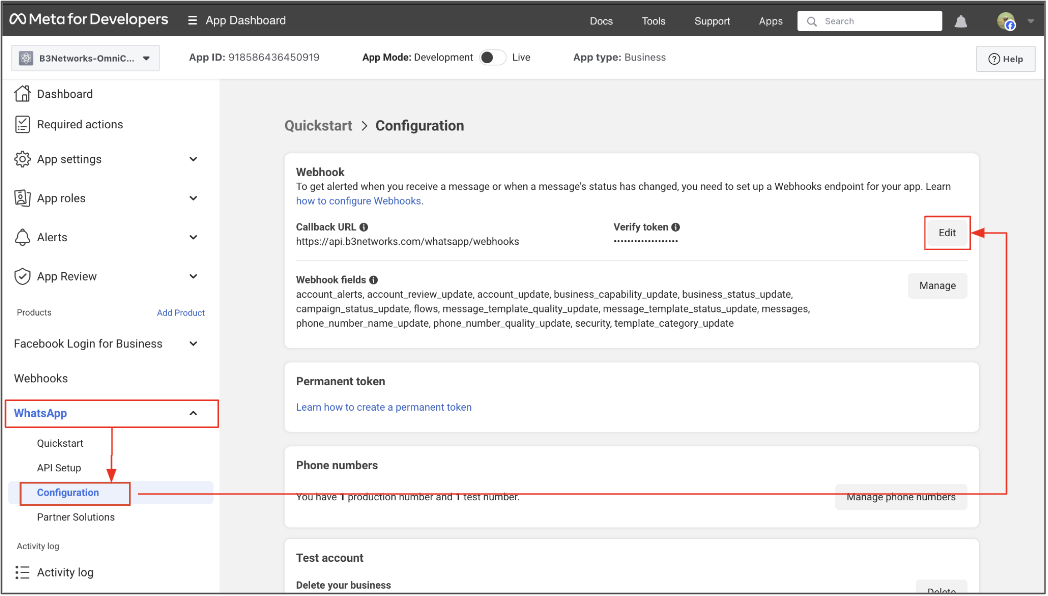
- A pop up appears on the screen
- Input Callback URL (Webhook Endpoint)
- Input Verify token (Token)
- Click Verify and save
Create Whatsapp Template
A WhatsApp Template is required for users in order to use the WhatsApp Back Function provided by WhatsApp Business. To create a WhatsApp template, please follow the steps shared below.
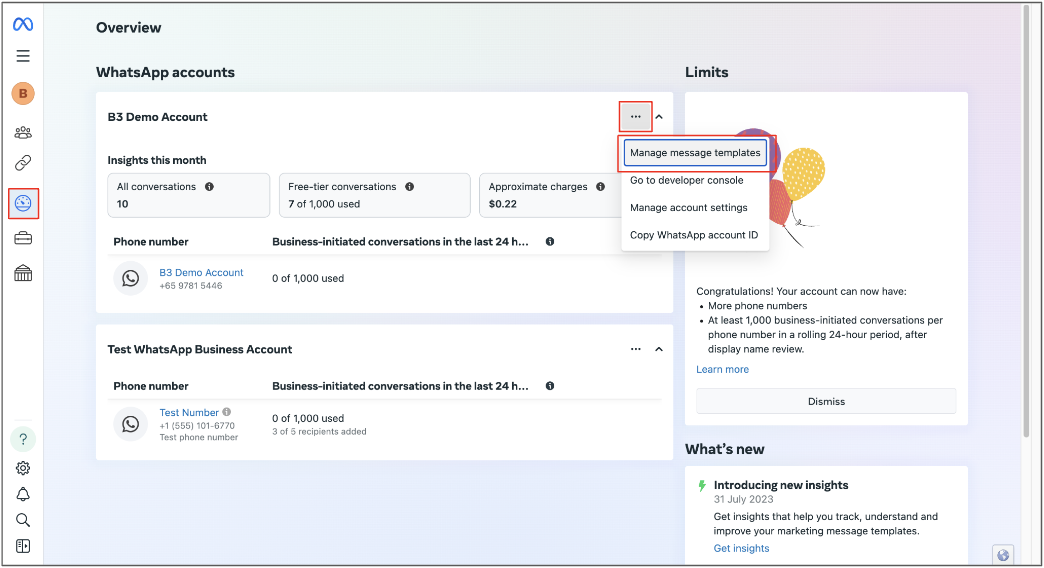
- Go to WhatsApp Manager
- Select a business account
- Click on the 3 ellipsis ( ... ) icon and select Manage message templates
- Inside Message templates page, click Create Template
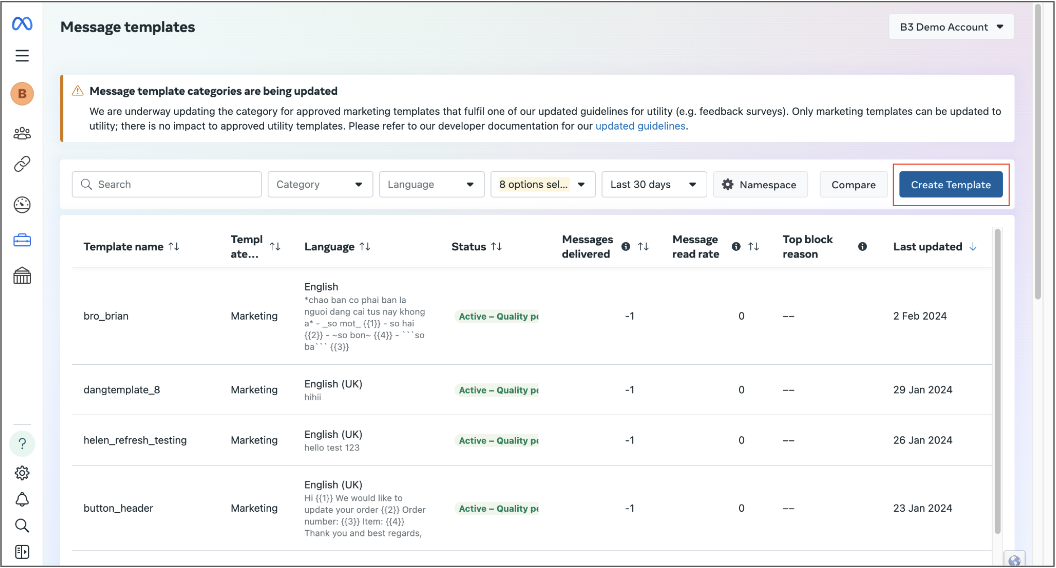
- Once you click on Create Template, a new page (New message template) will open
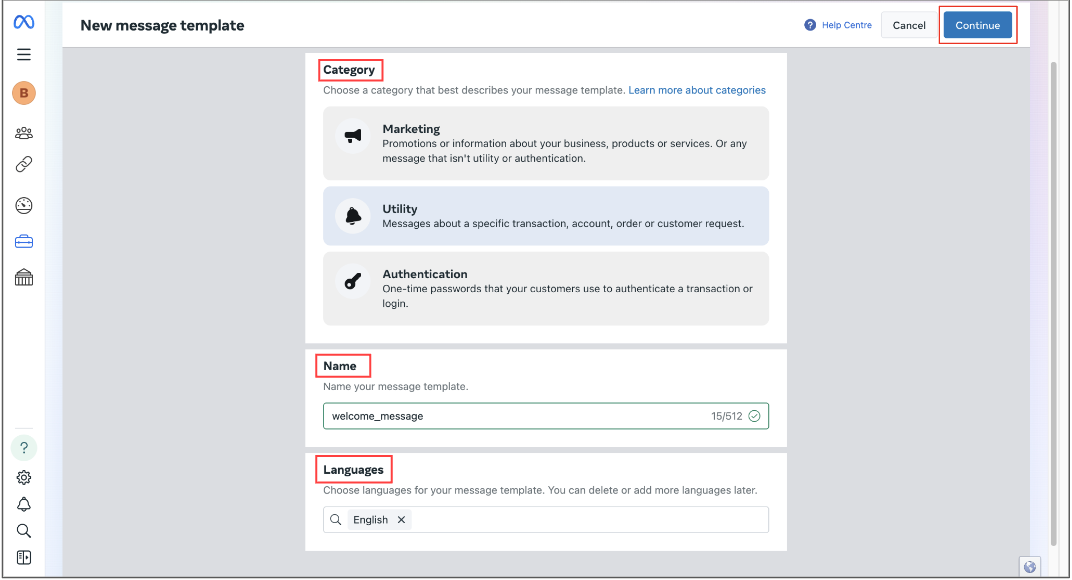
- Select Category
- Input Name
- Select Languages
- Click Continue
- Add Header (optional)
- Input text body
- Input Footer (optional)
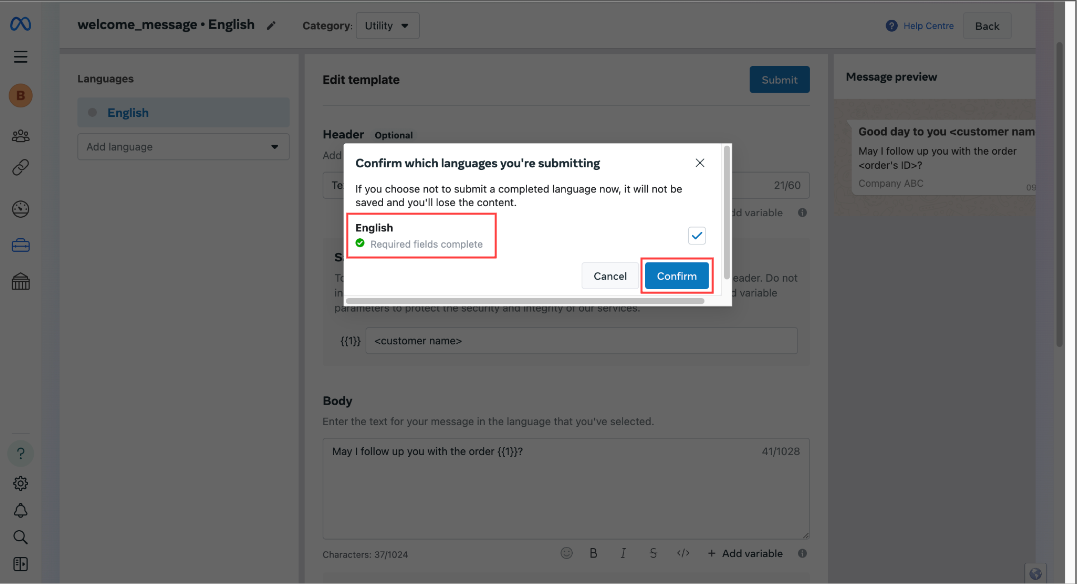
- Click Submit
- Tick selected languages
- Click Confirm
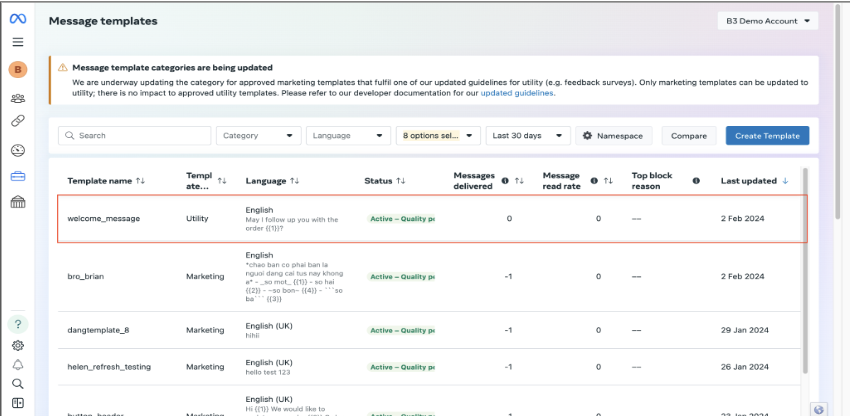
Template Status
- The template is created and pending for review.
- Users can check the status of the template.
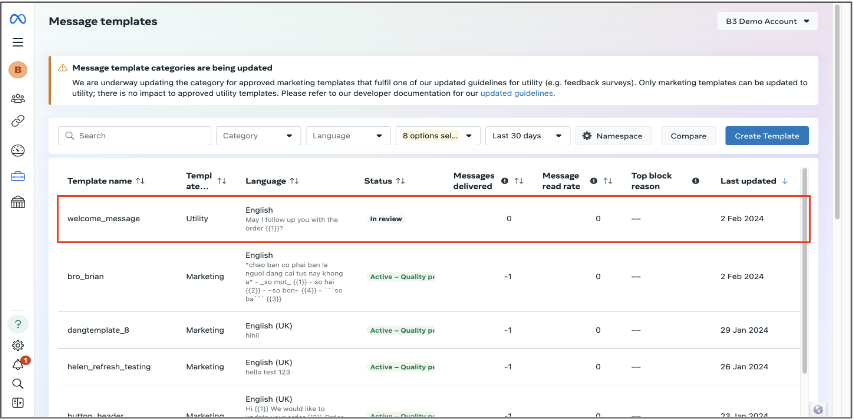
- Once the review is completed, the template will be ready for use.
Create WhatsApp Inbox
- Go to Phone System
- Select View - System
- Go to Omnichannel - Inbox
- Click Create
- Fill in Name
- Select type WhatsApp
- Choose Assignment mode
- Round Robin
- Manual
- Proficiency Level
- Transactions are assigned to the agent with the highest proficiency level among the available agents.
- If multiple agents share the same highest level, the system applies round-robin logic.
- By default, each agent’s proficiency level is set to 1, and users can edit this value as needed.
- The minimum allowed value is 1, max = 100, and users cannot decrease it to 0.
- This field is editable, allowing users to adjust the proficiency level for each agent individually.
- Sticky Agent
- First Whatsapp transaction: When a customer send the message for the first time, the system will use the round-robin method to distribute the transaction among all available agents.
- Subsequent transaction: From the second chat onward, the system will attempt to route the transaction to the last assigned agent (the sticky agent).
- Fallback Condition: If the sticky agent is unavailable or misses the transaction for X consecutive times, the system will revert to round-robin assignment among available agents to ensure the chat is answered promptly.
- Number of Dials to Agents: Specifies how many times the system will attempt to dial the same agent before re-assigning the chat to another agent. Default value: 1. (Limit: 1-100)
- Longest Idle
-
Incoming transaction: When a customer send a WhatsApp, the system identifies all available agents and selects the one who has been idle the longest (i.e., the agent who has not handled any WhatsApp transaction for the longest time).
- Track Agent Idle Time: Each time an agent ends a WA chat, the system records a timestamp.
- Calculate Idle Duration: idle_duration = current time - last chat end time
- Equal Idle Time: If multiple agents share the same idle duration, the system will apply the round-robin rule to assign the chat among them.
- Agent Becomes Busy: Once an agent accepts a WhatsApp transaction, their idle timer resets. The system will then exclude that agent from further assignment until they finish the current transaction.
-
Incoming transaction: When a customer send a WhatsApp, the system identifies all available agents and selects the one who has been idle the longest (i.e., the agent who has not handled any WhatsApp transaction for the longest time).
- Set a Reassignment timing
- Time (in seconds) to reassign a conversation if not accepted by the selected agent.
- The default value is 30 seconds.
- Users can configure the reassignment timing within the allowed range from 1 to 900 seconds
- Turn ON or OFF for Auto-accept chats for assigned agents
- Select Agents (Agents must have sufficient licenses)
- Click Create
Note:
- One inbox can only have one number
- The agent list only displays those users who have been assigned Contact Center + WhatsApp add-on license
- Enabling Auto-accept will not affect conversations that are already in progress. It only applies to transactions assigned after the toggle is turned on.
Scenario |
Auto-accept OFF (default) |
Auto-accept ON |
Auto assignment |
Agent receives request and must accept/reject |
Conversation assigned directly — no action needed |
Manual assignment |
Agent receives request and must accept/reject |
Conversation assigned directly — no action needed |
Transfer |
Agent receives request and must accept/reject |
Conversation assigned directly — no action needed |
Reassignment timing |
Applied as configured |
Hidden and disabled |
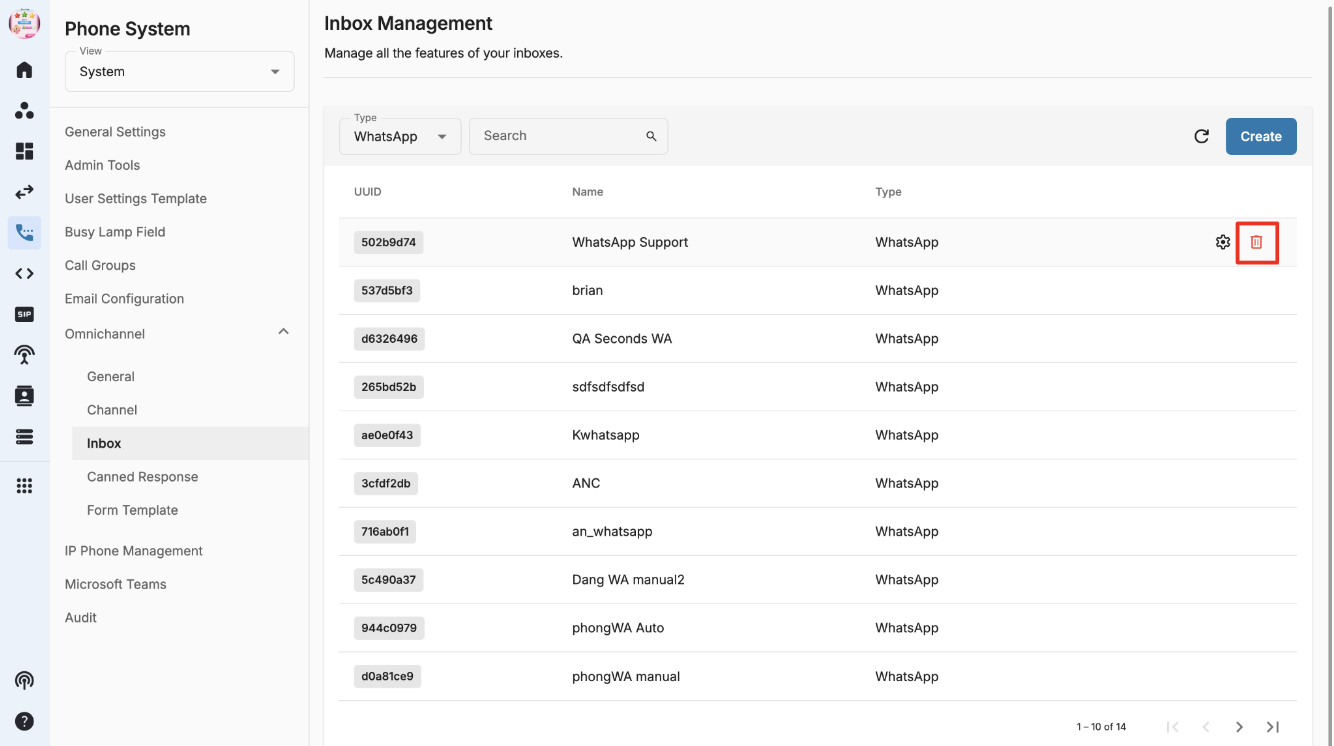
Edit / Delete WhatsApp Inbox
- Users can view/edit Inbox Name for WhatsApp after creation:
- Overview

- Users can easily edit and delete an inbox after creation.
WhatsApp Inactivity Event
- Navigate to Phone System → Omni Channel → Inbox
- Create a new WhatsApp inbox or Edit an existing one
- Go to the Inactivity Action tab/menu
-
Click Add Action to configure a threshold:
- Set the time (in minutes) after which the action should trigger
-
Choose an action:
- Send Message — enter the message content to be sent to the customer
- Close Transaction — automatically ends the chat session
- Repeat to add up to 3 thresholds in sequence
- Save the configuration
