Create a New Channel (Live Chat)
Discover the step-by-step process of creating a new channel, including tips on customization and optimization to help you reach a wider audience.

Written by B3Networks Academy
Updated at July 9th, 2025
-
OSS/BSS Answers
Access Control Security Hub Admin Audit B3Network Master Account Channel App Contract App Customer App Discount App Edge Server File Management Finance App Invoice App Number Management Payment Portal Settings Price List Product App Release V2 SMS Gateway Supplier App Support Center Support Hub Business Hub Sales Hub Finance Hub
- App Model - Organization Management
- App Model - Communication Apps Answers
- License Model - Organization Management
-
License Model - CPaaS Solution Answers
Phone System - Admin Guide Phone System - End-user Guide Mobile App Desktop App Web Phone Omni-Channel Auto Attendant - Admin Guide Developer Hub - Admin Guide Microsoft Teams Operator Connect - Admin Guide Microsoft Teams Direct Routing - Admin Guide Contact Center - Supervisor Guide Contact Center - Agent Guide SIP Trunk CPaaS - SIP Trunk Power SIP Trunk CPaaS Fax CPaaS Hotdesking Contact Campaign File Explorer Power Mobile App Files App Campaign App
- Telcoflow
- Integrations Answers
- Updated Regulations
- Ideas Portal
Table of Contents
Create a New Channel
Whenever a new chat is created, first, it will be checked by Channel’s Working Hours layer to decide if the chat follows the Working Hour, Non-working Hours or the Public Holiday flow.
Within Working Hours: Chat will follow the Working Hours flow
- System will display messages and check the next layer
- Chat Routing: Single Inbox / Multiple Inboxes / Programmable Flow, then it will be assigned to an agent based on their availability and assignment mode.
After Office Hours: Chat will follow the Non-Working Hours flow
- System will display messages and check the next layer
- Chat Routing: None / Single Inbox / Multiple Inboxes / Programmable Flow, then it will be assigned to an agent based on their availability and assignment mode.
Public Holidays: Chat will follow the Public Holiday flow
- System will display messages and check the next layer
- Chat Routing: None / Single Inbox / Multiple Inboxes / Programmable Flow, then it will be assigned to an agent based on their availability and assignment mode.
Working Hours
The user can set up the public holiday for the channel and add the custom holiday.
Configuration:
- Go to Phone System
- View by System
- Choose Omnichannel on the sidebar
- Choose Channel
- Click on Create
- A new popup window will appear
- Choose Type
- Input Channel Name
- Click Next
- System will navigate you to a new page
- Configure a Welcome message for blocked contacts
-
Turn the toggle on if you want to send chat transcript to your customers after the chats ends
- For this, you need to set up your sender email in the Address page first.
- Select Public Holiday
- Select a Country from the dropdown list
- Enable Custom Holiday
- Select a custom holiday list that admin / owner created in Manage Organization - Public Holiday tab
Note
- Public Holiday by country = None means the current channel has no public holiday.
- Channel does not follow the organization's default public holiday.
- Custom Holiday is not a recurring event. It will only be applied for the appointed date.
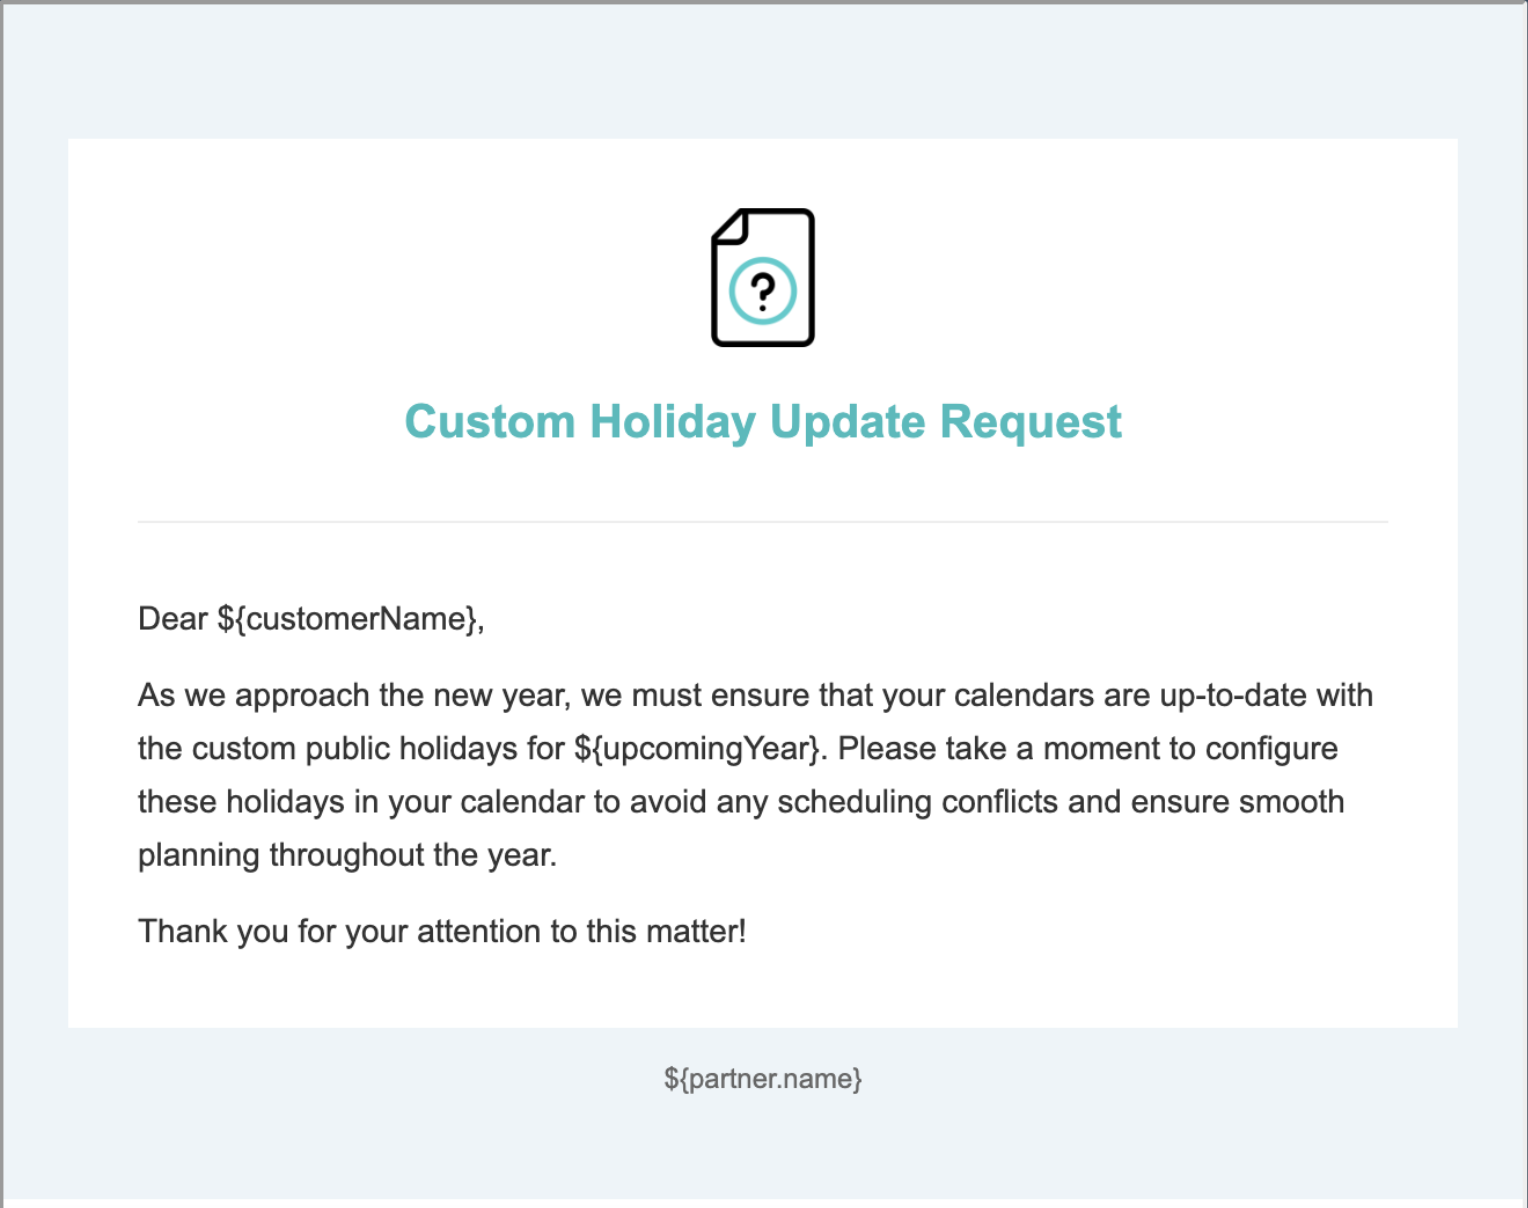
- Please note that these settings for custom holidays are not recurring. You will receive a reminder on December 24th of each year to review and update your custom public holiday configurations for the upcoming year, provided that at least one custom holiday is configured.
- Click Next

Chat Flow - Working Hours
- Fill in the Title and Welcome Message for your Chat Widget
- Enable Require Customer Verification.
- The admin can choose either to verify visitor’s identity. Their transactions will be marked as Verified.
-
Types of verification
- Sign in with Microsoft
- Sign in with Google
- Sign in with Email (Require Email verification). For this you need to set up your sender email in the Address page first.
- Sign in with Singpass
- The visitor would need to sign in with the selected method before they can start a chat

When the button text or the assigned inbox in the configuration section is highlighted with an error for Working/Non-Working Hours and Public Holiday chat flow, system will change the button text preview to Red colour.

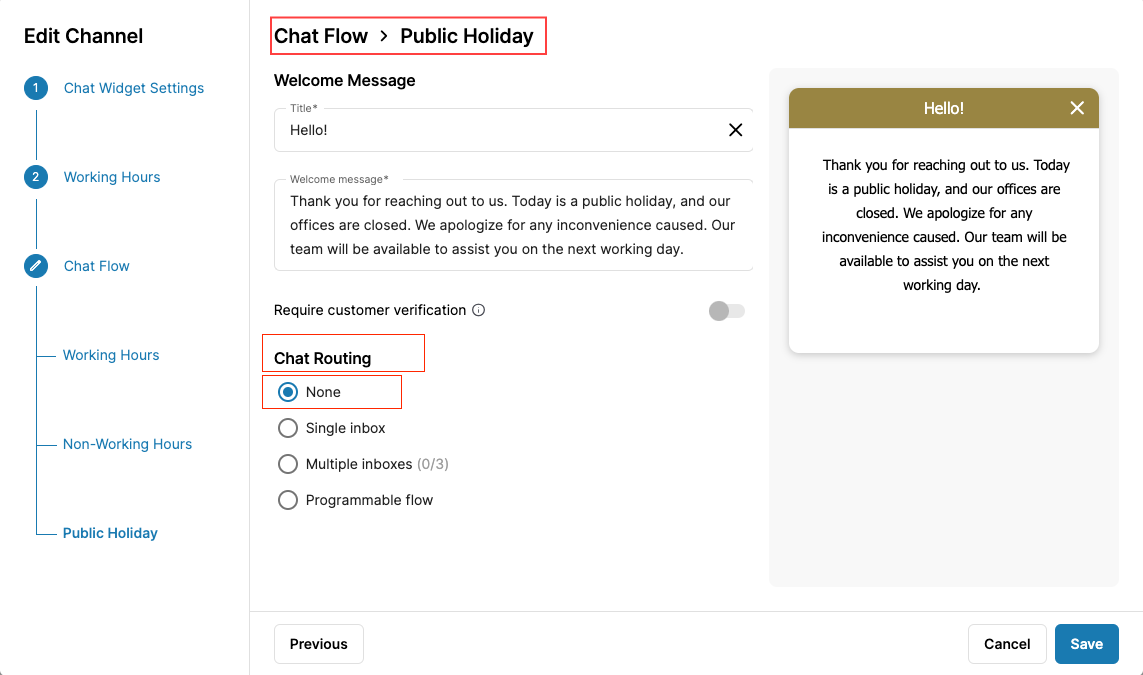
Chat Routing-None
- Selecting this option will not assign to any inbox and display the welcome message only.
- “None” option only applies for Non-working hours and Public holiday.
- Go to Chat Routing and select None
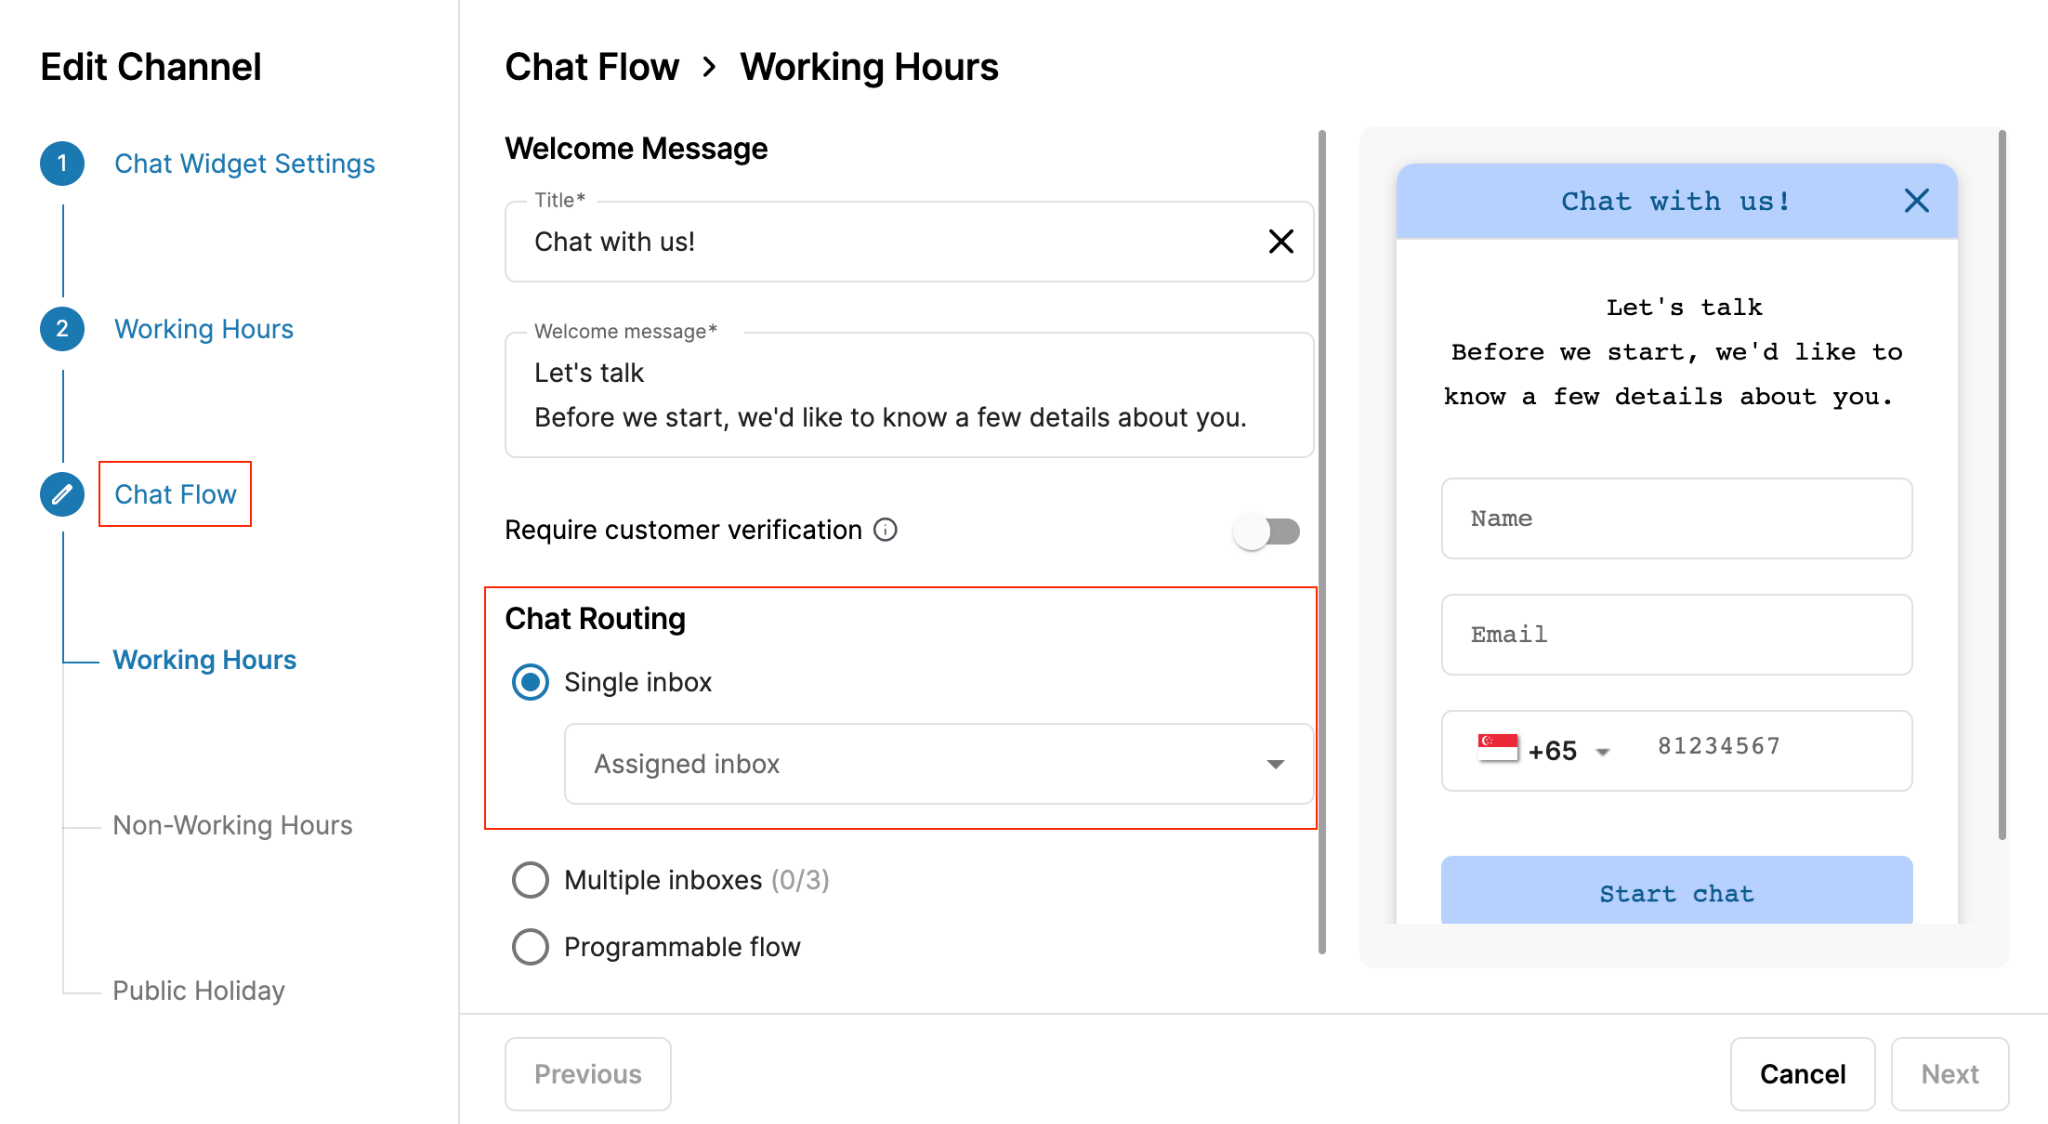
Chat Routing - Single Inbox
When the Customer presses Start Chat, the Conversation will be routed to 1 specific Inbox.
- On tab Chat Flow, choose Chat Routing: Single Inbox
- Choose an assigned inbox
- Click Next to configure chat flow for Non-working Hours and Public Holiday
- Click Save.
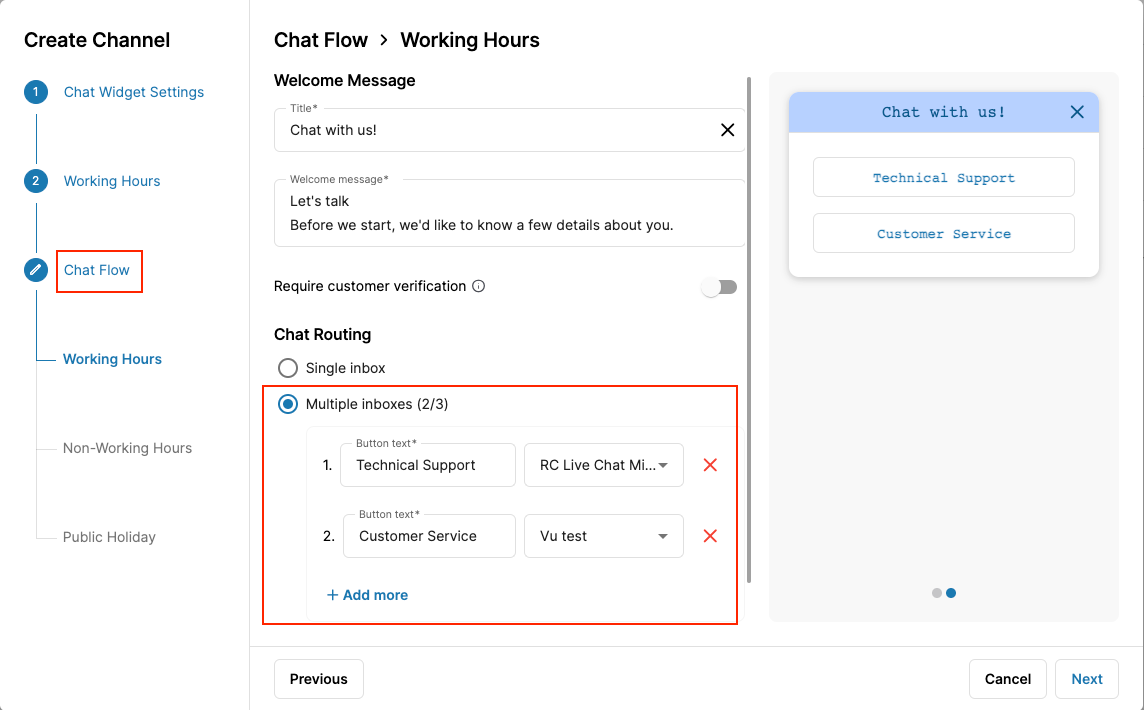
Chat Routing - Multiple Inboxes
When the Customer presses Start Chat and selects an option, the conversation will be routed to 1 specific Inbox.
- On tab Chat Flow, choose Chat Routing: Multiple Inboxes (Allow up to 3 additional inboxes)
- Input Button text (maximum 20 characters can be added)
- Assign routing Inbox from the dropdown list
- Click Next to configure chat flow for Non-working Hours and Public Holiday
- Click Save.
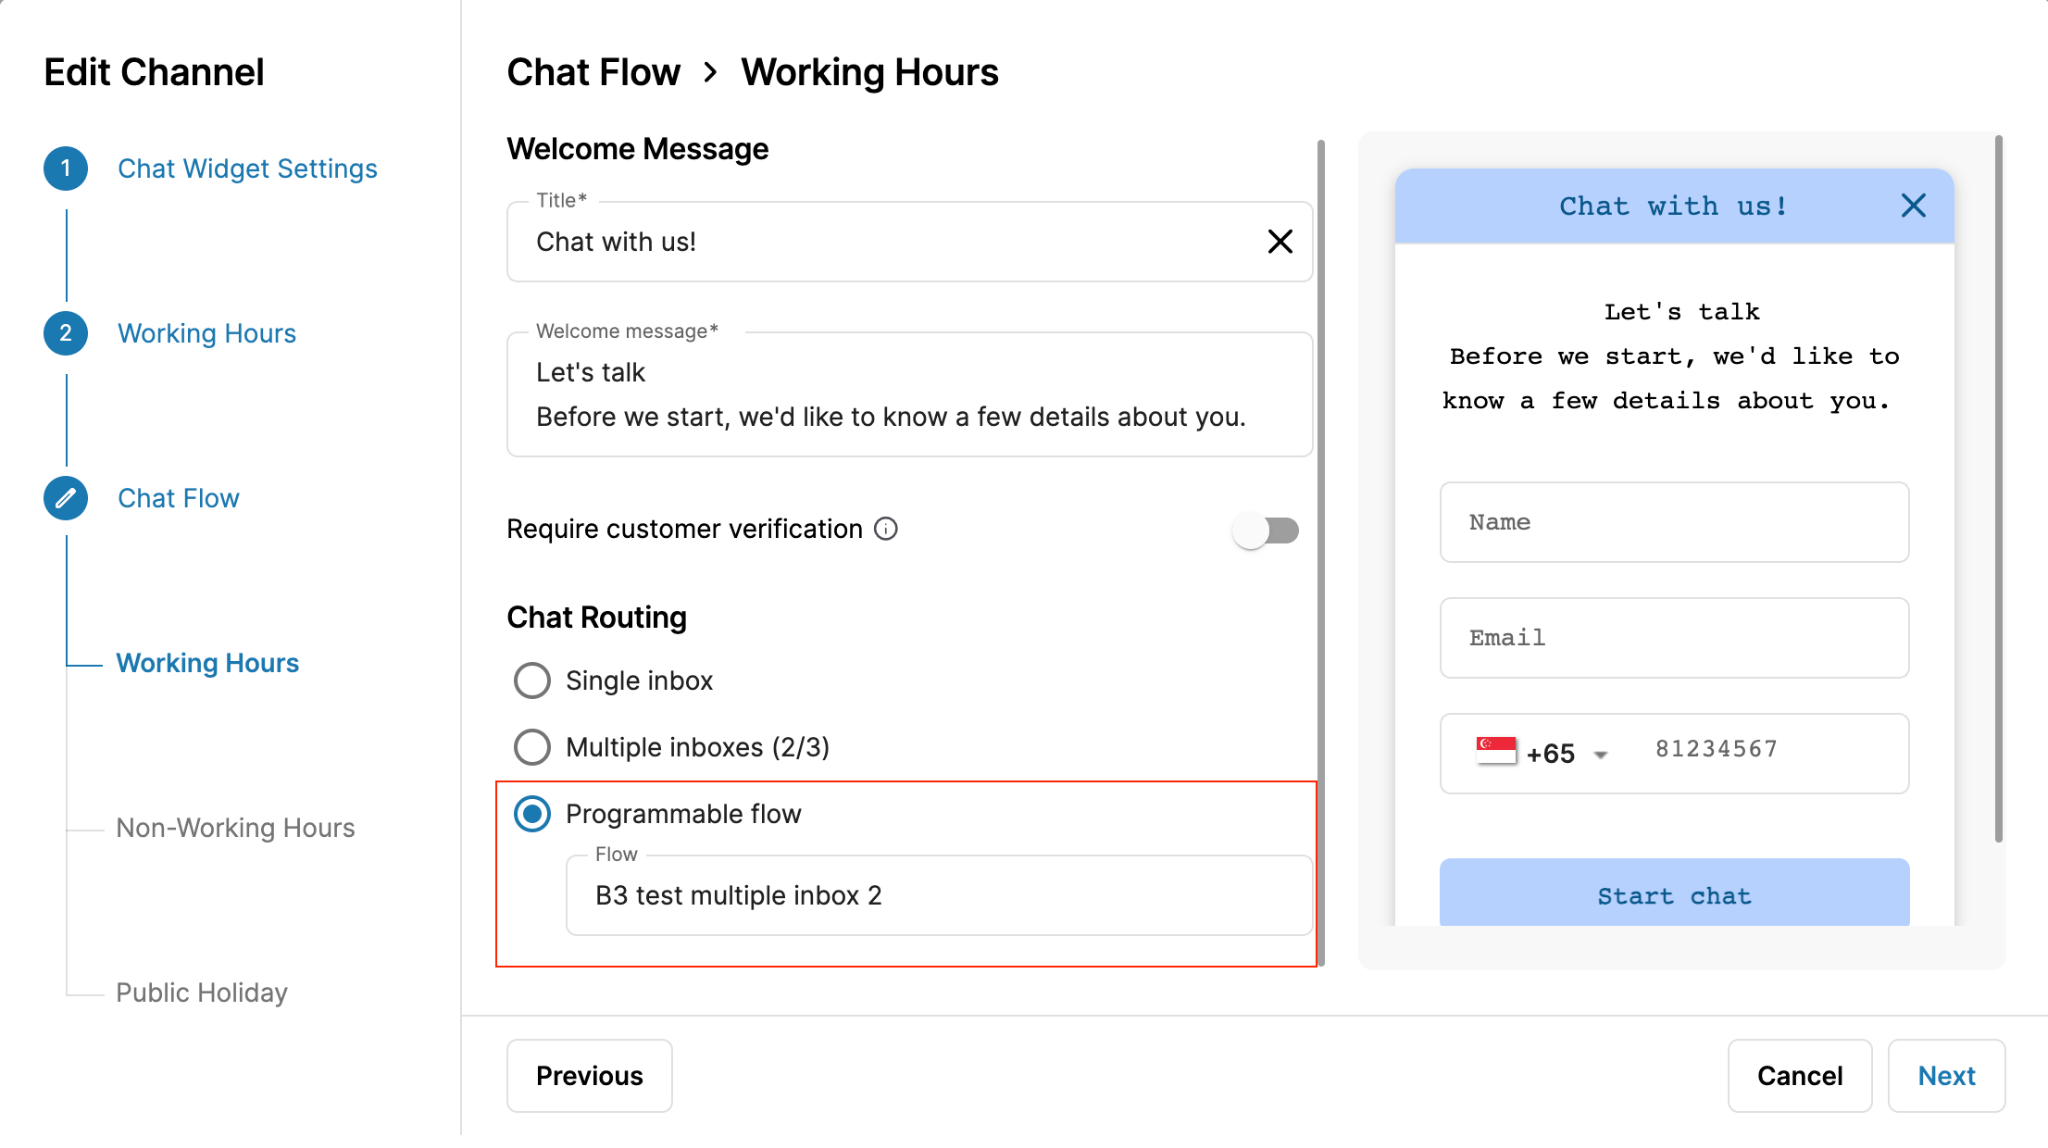
Chat Routing - Programmable Flow
When the Customer presses Start Chat, the Developer Flow configurations will handle the Conversation.
- On tab Chat Flow, choose Chat Routing: Programmable Flow
- Choose a programmable flow from the dropdown list
- Click Next to configure chat flow for Non-working Hours and Public Holiday
- Click Save.
Chat Flow - Non-Working Hours
- Fill in the Title and Welcome Message for your Chat Widget
- Enable Require Customer Verification.
- The admin can choose either to verify visitor’s identity. Their transactions will be marked as Verified.
-
Types of verification
- Sign in with Microsoft
- Sign in with Google
- Sign in with Email (Require Email verification). For this you need to set up your sender email in the Address page first.
- Sign in with Singpass
- The visitor would need to sign in with the selected method before they can start a chat
- The available chat routing options for Non-working hours are:
- None (The incoming chat is not routed to any inbox). It will only show an auto response message set by the user.
- The other flows are similar to the Working Hours configuration.
- Single inbox
- Multiple inboxes
- Programmable flow

Chat Flow - Public Holiday
- Fill in the Title and Welcome Message for your Chat Widget
- Enable Require Customer Verification.
- The admin can choose either to verify visitor’s identity. Their transactions will be marked as Verified.
-
Types of verification
- Sign in with Microsoft
- Sign in with Google
- Sign in with Email (Require Email verification). For this you need to set up your sender email in the Address page first.
- Sign in with Singpass
- The visitor would need to sign in with the selected method before they can start a chat
- The available chat routing options for Non-working hours are:
- None (The incoming chat is not routed to any inbox). It will only show an auto response message set by the user.
- The other flows are similar to the Working Hours configuration.
- Single inbox
- Multiple inboxes
- Programmable flow

Edit/Delete a Channel
Edit a channel
- Go to Phone System
- Select Omnichannel tab
- Select Channel
- Hover over the live chat channel and click on the Settings icon.
- Select the option where you want to make changes.

Delete a channel
To delete a live chat channel, follow the steps below:
- Go to Phone System
- Select Omnichannel tab
- Select Channel
- Hover over the live chat channel and click on the Delete icon.
- System show warning toast list for website that widget is recently added.

