Credit Notes

Written by B3Networks Academy
Updated at March 14th, 2024
-
OSS/BSS Answers
Access Control Security Hub Admin Audit B3Network Master Account Channel App Contract App Customer App Discount App Edge Server File Management Finance App Invoice App Number Management Payment Portal Settings Price List Product App Release V2 SMS Gateway Supplier App Support Center Support Hub Business Hub Sales Hub Finance Hub
- App Model - Organization Management
- App Model - Communication Apps Answers
- License Model - Organization Management
-
License Model - CPaaS Solution Answers
Phone System - Admin Guide Phone System - End-user Guide Mobile App Desktop App Web Phone Omni-Channel Auto Attendant - Admin Guide Developer Hub - Admin Guide Microsoft Teams Operator Connect - Admin Guide Microsoft Teams Direct Routing - Admin Guide Contact Center - Supervisor Guide Contact Center - Agent Guide SIP Trunk CPaaS - SIP Trunk Power SIP Trunk CPaaS Fax CPaaS Hotdesking Contact Campaign File Explorer Power Mobile App Files App Campaign App
- Telcoflow
- Integrations Answers
- Updated Regulations
- Ideas Portal
Table of Contents
A credit note is very similar to a sales invoice or bill, except it reduces the amount owed by a customer to you, or that you owe to a supplier. It's raised against a customer or supplier and remains as an awaiting payment until it has been fully applied to an invoice or bill.
A credit note is issued in various situations to correct a mistake:
- An invoice amount is overstated
- Correcting discount rate is not applied
- Goods spoil within guarantee period
- They do not meet the buyer's specifications and are returned. Also called credit memo.
1. Create a Credit note
Credit notes can be added in 2 ways in Finance app, depending on how you need to issue or record the credit. You can:
- Add a new credit note for a customer or supplier
- Copy an existing credit note.
Method 1:
- Go to the Credit Notes tab
- Click + New Credit Note
- Fill in the necessary fields
- Create
Note:
- Users can select custom tax rates: 7%, 8% and 9% (Default tax rate)
- The tax rate is returned to its default of 9% upon deactivating the toggle button
Method 2:
- Go to the Credit Notes tab
- Choose a particular credit note
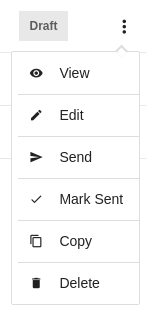
- Click on the 3 dots icon
- Select Copy
- Fill in the necessary fields
- Edit (optional)

2. Approve a credit note
To approve a Credit Note, click Mark as Sent, and the status is now Sent.
3. Allocate credit of Credit note to invoice(s)
This step must be done in Invoice app.
- Go to the Invoice app
- Select the Invoice tab
- Choose a particular invoice
- Click on 3 dots icon
- Choose Allocate:
- Enter the amounts in the Amount to Credit fields for each unpaid invoice you want to credit. You can apply the full credit amount or just some of it.
- You can click the invoice links to drill into the transactions. A list of invoices is also available for you so that you can pick up some invoices to allocate credit to.
Note:
- Credit note can be allocated to the UNPAID invoice only.
If you want to use the credit note CN-0001 to offset a PAID invoice IN-0011. Follow the instructions below:
- Remove the payment of IN-0011.
- The invoice IN-0011 becomes unpaid.
- Allocate the credit note CN-0001 to that invoice.
