Create a New Channel (Ticket)

Written by B3Networks Academy
Updated at September 11th, 2025
-
OSS/BSS Answers
Access Control Security Hub Admin Audit B3Network Master Account Channel App Contract App Customer App Discount App Edge Server File Management Finance App Invoice App Number Management Payment Portal Settings Price List Product App Release V2 SMS Gateway Supplier App Support Center Support Hub Business Hub Sales Hub Finance Hub
- App Model - Organization Management
- App Model - Communication Apps Answers
- License Model - Organization Management
-
License Model - CPaaS Solution Answers
Phone System - Admin Guide Phone System - End-user Guide Mobile App Desktop App Web Phone Omni-Channel Auto Attendant - Admin Guide Developer Hub - Admin Guide Microsoft Teams Operator Connect - Admin Guide Microsoft Teams Direct Routing - Admin Guide Contact Center - Supervisor Guide Contact Center - Agent Guide SIP Trunk CPaaS - SIP Trunk Power SIP Trunk CPaaS Fax CPaaS Hotdesking Contact Campaign File Explorer Power Mobile App Files App Campaign App
- Telcoflow
- Integrations Answers
- Updated Regulations
- Ideas Portal
Table of Contents
Create a Ticket Channel
To create a support ticket channel, follow the steps below:
- Go to Phone System > view System
- Select Omnichannel and click on the Channel tab
- Click the Create button
- Choose the channel type as Ticket
- Input channel name

- To configure the channel for omnichannel Email, turn the toggle for Email Configuration ON in the General section. Enter a Sender Name (this will appear in the customer’s inbox) and select or add a Sender Email (must belong to a verified domain)

- Configure working hours:
- Public holiday
- Custom holiday
- Working hours

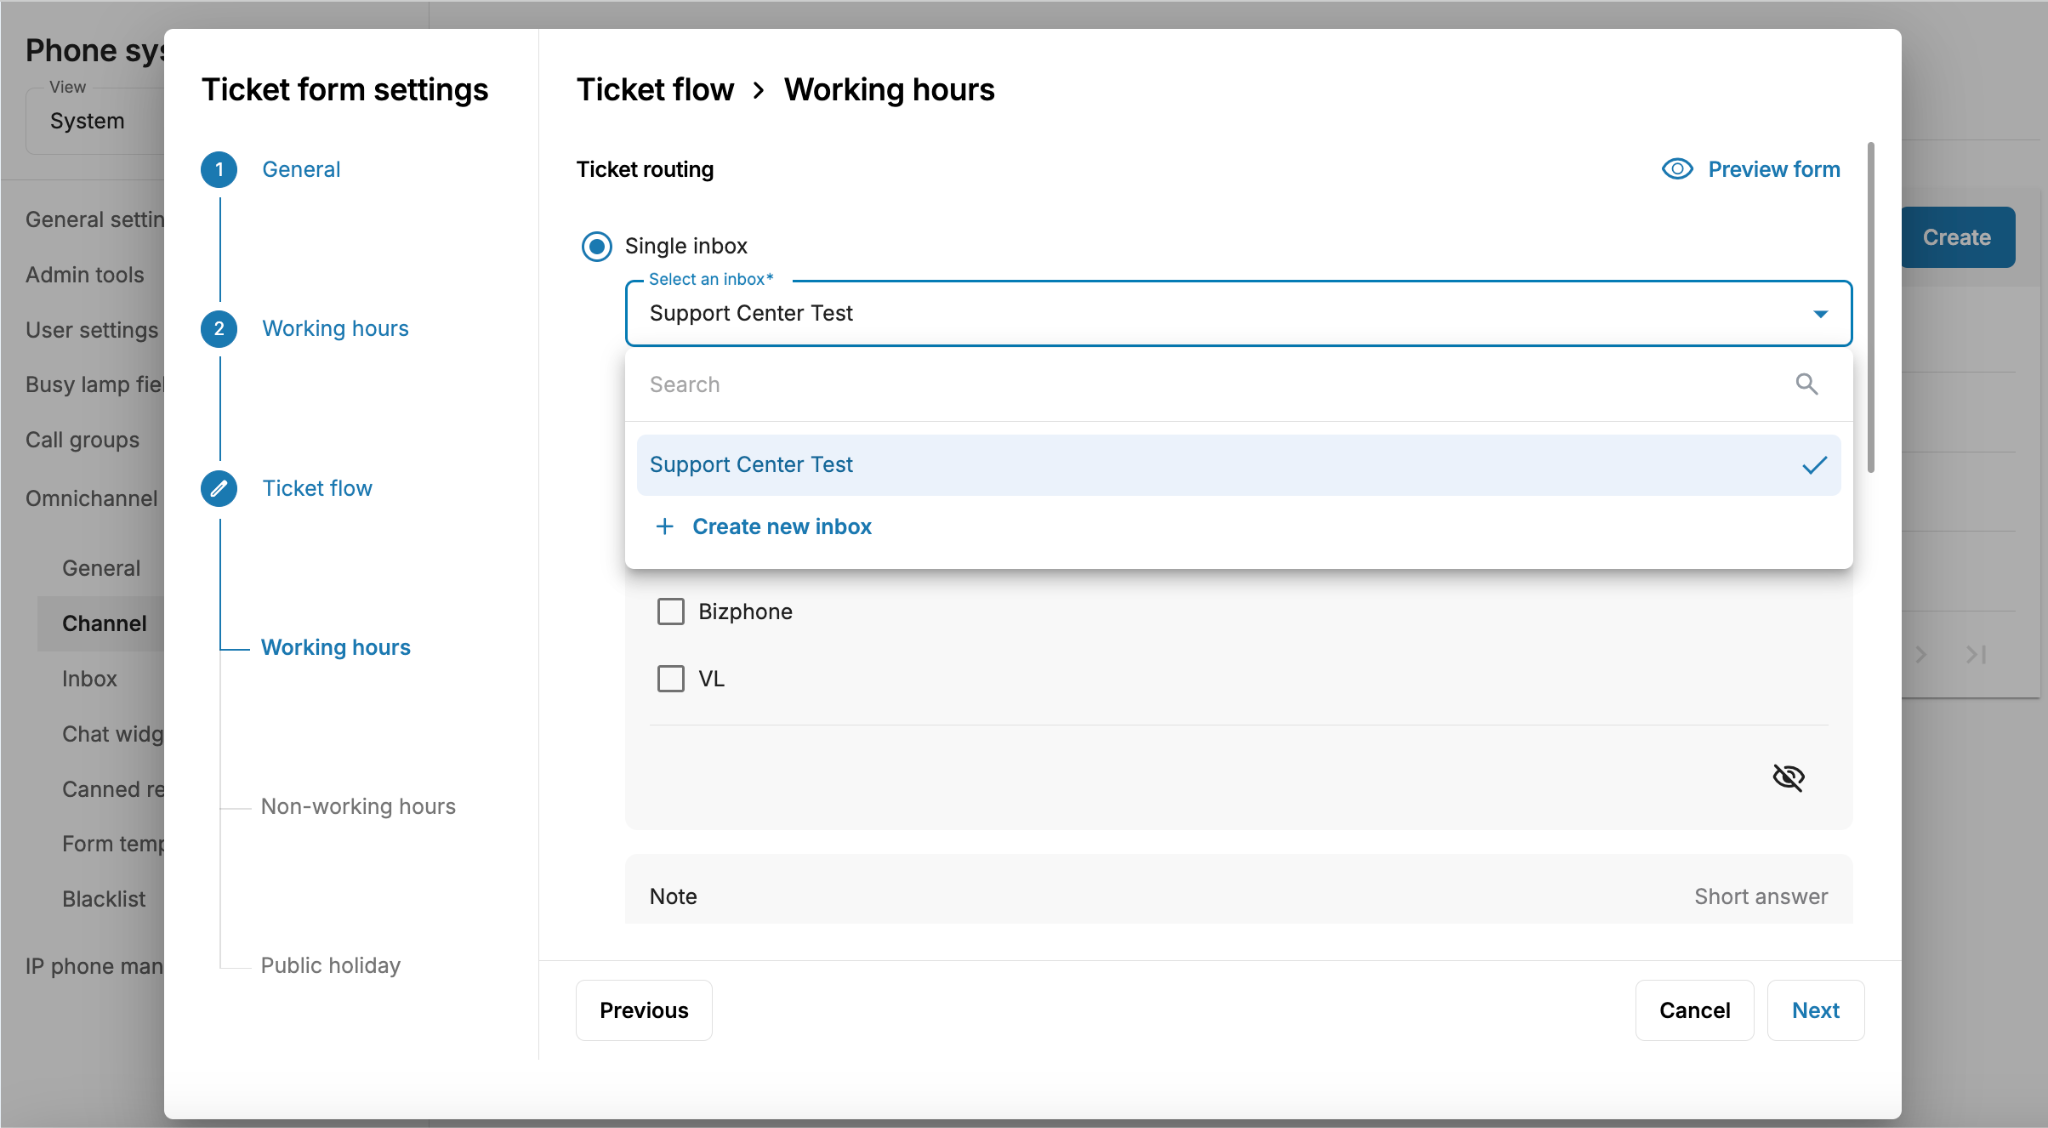
- Choose an inbox to route the ticket to that inbox during working hours.
- The form and its fields will be shown.
- Toggle the eye icon to show it on the form for customer to submit.

- Choose an inbox to route the ticket to during non-working hours.

- Select an inbox to route the ticket to on public holidays.

- Save to finish
Edit a Support Ticket Channel
Users can edit a support ticket channel after creation following the steps below:
- Go to Phone System > view System
- Select Omnichannel and navigate to the Channel tab
- Select type = Ticket
- Search for the Channel that you want to set up
- Click on the Setting icon
- Configure the settings and click Next
- Under Ticket Flow > Working Hours, select Single Inbox or Multiple Inboxes.
- Choose an Inbox with a configured form.
- Click Next to continue configuring.
- Click Create / Save to finalize the setup.
-
Notes:
- Click the eye icon to show/hide questions in the ticket form.
- Click ‘Preview Form’ to preview the form.
-
Notes:
Delete a Support Ticket Channel
- Navigate to Phone System > View System.
- Under the Omnichannel, click on the Channels tab.
- Choose an existing Ticket channel.
- Click the Delete icon
- Review the details in the popup message, and confirm by clicking Delete.

Note
- Deletion is irreversible.
- Transactions created from deleted channels will remain unaffected.
- Deleted channels cannot be selected or reactivated after deletion.
- Before deletion, check if the channel is shared with other accounts and list all shared accounts and affected shared channels.