Homepage Tabs

Written by B3Networks Academy
Updated at December 4th, 2025
-
OSS/BSS Answers
Access Control Security Hub Admin Audit B3Network Master Account Channel App Contract App Customer App Discount App Edge Server File Management Finance App Invoice App Number Management Payment Portal Settings Price List Product App Release V2 SMS Gateway Supplier App Support Center Support Hub Business Hub Sales Hub Finance Hub
- App Model - Organization Management
- App Model - Communication Apps Answers
- License Model - Organization Management
-
License Model - CPaaS Solution Answers
Phone System - Admin Guide Phone System - End-user Guide Mobile App Desktop App Web Phone Omni-Channel Auto Attendant - Admin Guide Developer Hub - Admin Guide Microsoft Teams Operator Connect - Admin Guide Microsoft Teams Direct Routing - Admin Guide Contact Center - Supervisor Guide Contact Center - Agent Guide SIP Trunk CPaaS - SIP Trunk Power SIP Trunk CPaaS Fax CPaaS Hotdesking Contact Campaign File Explorer Power Mobile App Files App Campaign App
- Telcoflow
- Integrations Answers
- Updated Regulations
- Ideas Portal
Table of Contents
My work
Inside "My work" tab agents can manage all of their assigned tickets including the tickets they have created, they're in the loop of, or they've been assigned by someone else. This feature allows agents to stay informed on tickets that may impact their work or require future action.

Agents can monitor the progress of tickets, check their current status, and make edits to ticket content when necessary. They also have the ability to reopen tickets if required. Additionally, agents can see who originally created the ticket and track its assignment, observing the stages and individuals responsible at each point in the workflow.

- Agents can search the tickets via txn UUID, ticket number, org UUID and title.

- Tickets are categorized in the following manner: Assigned, Created, Watching, Mentioned, Worked on
- Upon clicking any specific ticket, details will be displayed on the right side of the screen.
- For better usability and clarity, descriptive text has been placed next to action icons to help users quickly understand each function which can be performed on the ticket.

- Users can add or remove various filters to simplify their search process.
Inboxes
This sections consolidates all channels, including Live Chat, WhatsApp, Support Tickets, and Calls, into a single "Inboxes" tab.
- When a user clicks on this tab, they can easily view all incoming transactions in one place. Any transaction with new messages or comments will display a red dot icon, making it simple to identify.
- After selecting a specific inbox, you can view detailed insights into the customer’s interactions and history under the "Customer Journey" section by navigating to "Details".

Upload Files with Text (Team Chat, Live Chat, WhatsApp, Internal Discussion)
Users can upload files together with text across all conversation channels, including:
- Team Chat
- Live Chat
- Internal Discussions
Upload Rules:
- Maximum file size: 1GB per file
- Maximum files per upload: 30
- If more than 30 files are selected, an error message will appear: “Can't select more than 30 items” and additional file selection will be disabled.
- Caption limit: Up to 256 characters per message

Inbox Types
Users can search and navigate the inboxes from the “Type” drop-down menu, which includes:
- Live chat
- Support Ticket
- Call

Search Cases in your Inbox by Multiple Identifiers
Users can also find cases using a variety of identifiers, which can include:
- Transaction UUID
- Customer Email
- Support Ticket Number
- Customer Phone Number
- Support Ticket Title
Note: For Live Chat, WhatsApp, and Call → remove Ticket Number.


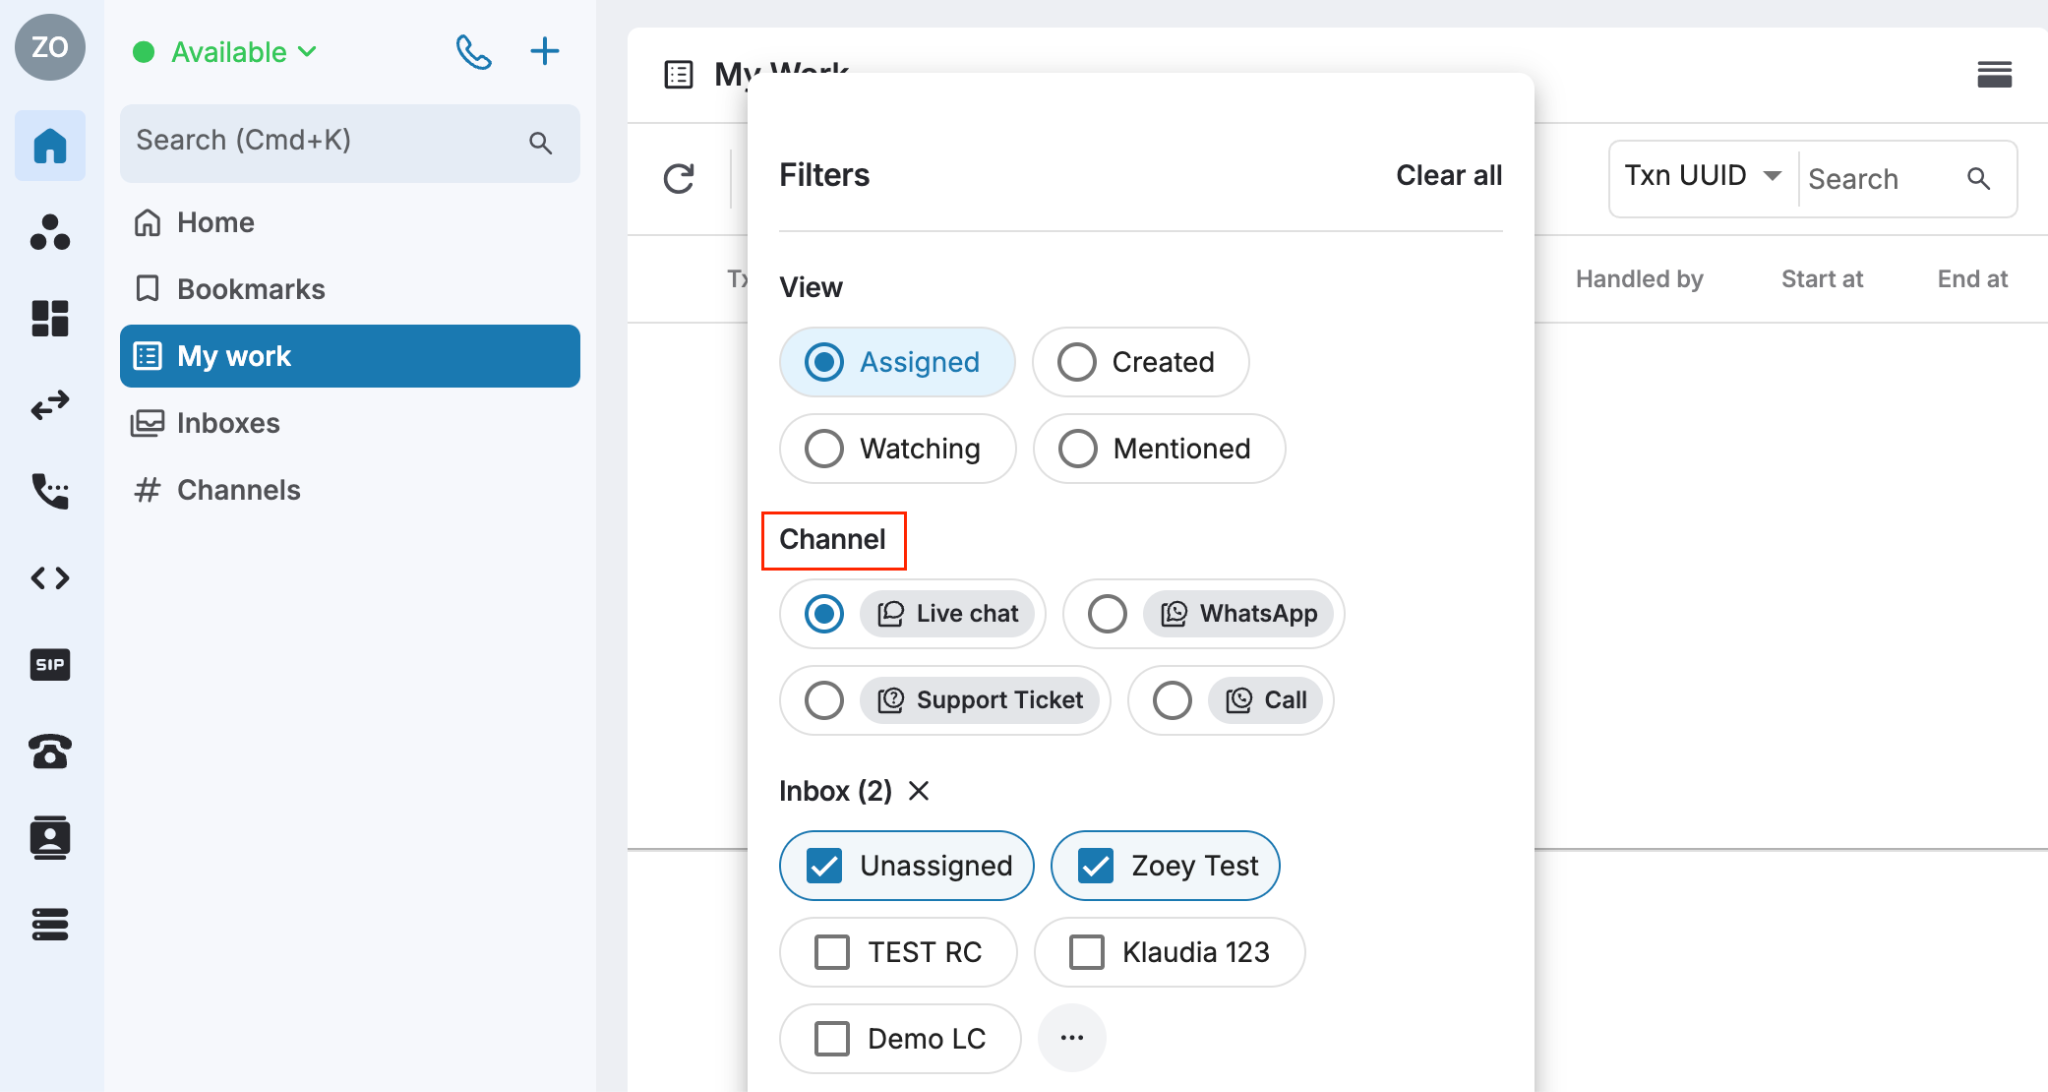
Inbox Filters
Filters under the Inboxes section make it easier to search and navigate inboxes

Open a Txn in a New Tab & Copy Txn URL
To simplify workflows, reduce repetitive filtering and eliminate the need to open multiple Unified Workspace tabs, users can now open individual transactions (txn) in a new tab and copy their direct URLs.
- Open in New Tab
- Simply Ctrl + Left Click (or Right Click > Open in New Tab) on any transaction from My Work, Inboxes, or Team Chat to view it in a separate tab.
- Copy Transaction URL
- Just Right Click > Copy Link on the desired transaction to share or revisit it directly.

Channels
Channels function as chat rooms where users can assign names based on a project, topic, or team. Users also have the option to set these channels as either public or private.
To create a channel:
- Go to Homepage
- Click on the “+” icon
- A new window “Create Channel” will appear

- Select the option to make the channel Public or Private
- Input channel name
- Add description
- Add members
- Click Create Channel

- Once created, users can click on the channel to view it
- Users can easily search or pin the messages inside a channel
- Click on the Upload button to upload files in the channel

- Click on the channel name to get channel details
- A new window will open showing channel details and members
- Users can click on the Edit button to edit channel name and description
- Users can Star the channel by clicking the star icon ( ☆ )
- Channels can be archived by clicking on the Archive Channel button

- A pop-up message will appear
- Click on Archive to proceed

Organization owner can transfer or claim the ownership of a channel on the home page.
| Channel Owner's Status | Transfer / Claim channel ownership |
| Active | Only channel owner can trigger the act of transferring ownership to other channel members. |
| Inactive | Only organization owner can claim the ownership of the channel or transfer the ownership to any organization members who have team chat license. |
To transfer / claim a channel ownership, follow the steps below:
- Go to Home
- Select a channel
- Click on channel's name
- Hover the mouse to Channel owner
- click Transfer
- Choose members from the list
- Click Assign

Discover
The Discover tab in the Channels section is designed to facilitate easy browsing of all active and archived channels within the organization. This feature helps users efficiently explore, access, and manage channels as needed.
User can see all active / archive channels that they joined and can discover other company public channels.

Newsfeed
Feature Overview
The Newsfeed feature helps keep users engaged by providing fresh, personalized updates. It encourages users to check the app regularly for new posts, comments, and announcements.
Benefits of Newsfeed:
- Keeps users informed with real-time updates
- Encourages frequent engagement with content
- Helps share important information quickly, such as product updates or service alerts
Sharing Newsfeed Across Organizations
To share a Newsfeed with other organizations, they must be linked together. This can be done in:
Manage Organization > Organization Connect
How to Search for a Newsfeed
Users can find a Newsfeed using:
- Discovery Page

- Universal Search > Team Chat Tab

To search for a post within a newsfeed, click on the search bar and type to search. The search results will appear below.

When clicking on a post URL, the user will be navigated to the post from URL, then the latest and the oldest posts.

How to Create a New Feed
- Go to the Home page
- Click on the [+] icon and select [Create Feed]
- Select the Visibility
- All Organizations
- Specific Organizations
Visibility |
Discoverable By |
Subscriber Access |
Organization Connect Required |
All Organizations |
All users under the Domain |
All users under the Domain |
❌ No |
Specific Organizations |
Main Org + Granted Customer Orgs |
Main Org + Granted Orgs |
✅ Yes, for granted Orgs |
For All Organizations
- Enter the Name and Description, then click Next.
- Choose a Publisher and Subscriber—only available for internal users of the admin organization. (Optional)
- Click Create.
Once the newsfeed is created, end users can find and subscribe to it through the "Discover Other Feeds" section.

For Specific Organizations
- Enter the Name and Description, then click Next.
- Choose a Publisher and Subscriber—only available for internal users of the admin organization. (Optional)
- Select organization connected, then Click Create.
Once the newsfeed is created, end users of granted org can find and subscribe to it through the "Discover Other Feeds" section.

Your new feed is now set up and ready to use.
How to Manage Newsfeed Settings
- Go to the Home page
- Select a feed and click on the feed title or Visit icon
- Click on the […] (More Options) icon
- Manage your feed using the following options:
- Star Feed – Mark important feeds for quick access.
- Edit Name and Description – Update the feed's details.
- Archive Feed – Deactivate the feed when it is no longer needed.

Limitations
To ensure optimal performance, the following limits apply:
- Maximum Created Feeds: Each organization can create up to 100 feeds.
- Maximum Subscribed Feeds: Each user can subscribe to up to 100 feeds.
- Users are not be allowed to change the Newsfeed Visibility after it is published, as this impacts subscribers.

How to Create a New Post
- Go to a feed and click on the feed title or Visit icon
- Click Create a Post
- Enter the Title and Description
- Choose one of the following options:
- Save as Draft – Save the post for later edits.
- Schedule – Set a time for the post to be published.
- Post – Publish the post immediately.

Note
Users can change the text colors for posts in the feed.

Note:
Each role in the Newsfeed (Owner, Publisher, Subscriber) has specific permissions for managing and interacting with feeds.

How to Manage a Post
- Go to a feed and click on the feed title or Visit icon
- Click on the […] (More Options) icon next to the post
- Choose one of the following actions:
- Edit Post
- Bookmark
- Delete Post
