How To Handle Transactions
-
OSS/BSS Answers
Access Control Security Hub Admin Audit B3Network Master Account Channel App Contract App Customer App Discount App Edge Server File Management Finance App Invoice App Number Management Payment Portal Settings Price List Product App Release V2 SMS Gateway Supplier App Support Center Support Hub Business Hub Sales Hub Finance Hub
- App Model - Organization Management
- App Model - Communication Apps Answers
- License Model - Organization Management
-
License Model - CPaaS Solution Answers
Phone System - Admin Guide Phone System - End-user Guide Mobile App Desktop App Web Phone Omni-Channel Auto Attendant - Admin Guide Developer Hub - Admin Guide Microsoft Teams Operator Connect - Admin Guide Microsoft Teams Direct Routing - Admin Guide Contact Center - Supervisor Guide Contact Center - Agent Guide SIP Trunk CPaaS - SIP Trunk Power SIP Trunk CPaaS Fax CPaaS Hotdesking Contact Campaign File Explorer Power Mobile App Files App Campaign App
- Telcoflow
- Integrations Answers
- Updated Regulations
- Ideas Portal
Table of Contents
Receive Chat
Auto Assignment Mode
- When customers start a chat, the transaction will be assigned to the available agent in the inbox.
- The agent can accept and start chatting with customer.


Manual Assignment Mode
- When customers start a chat, the transaction will be in waiting status.
- Supervisors can use Assign button to assign the chat to an agent.


Note:
- Agent Capacities applies to both Auto and Manual assignment mode, ensuring balanced workloads for agents regardless of the assignment mode.
- Agents will be assigned transactions precisely according to the capacities defined for them.
- A warning message will be displayed if an admin or agent attempts to assign more transactions than the defined capacities.

Upload and Send Files
Agent can attach and send files to customers in the following formats:
- JPG, JPEG, PNG, MP4, PDF, DOC(X), PPT(X), XLS(X)

Agent can also send files along with text messages during chats. For uploading files on Whatsapp via Unified workspace and devices, the following criteria should be fulfilled:
- Audio: 16MB
- Document: 100MB
- Image: 5MB
- Sticker: 100KB
- Video: 16MB (.mp4 format)
- Maximum files per upload: 30
- If more than 30 files are selected, an error message will appear: “Can't select more than 30 items” and additional file selection will be disabled.
- Caption limit: Up to 256 characters per message

Use Canned Response
There 2 methods to use canned responses:
- Agent can use organizational / personal responses via Canned Response button

- Agent can type /<Short-cut> in the chat box

Transfer Chat
- Agent can use the Transfer button to transfer an active chat to another agent or inbox.

End Chat
- Agent can use the End button to manually end an active chat.
- The system will automatically close an active chat after 24 hours since the last response from the customer.


Navigate to the Original Chat/Message
- Agent can click the hyperlinked Original Chat button to navigate to the origin message.

Send new WhatsApp Message
- Go to an ended transaction
- Click "Send new WhatsApp message"
- This button is located in two different positions:
- On the bottom of the screen
- Or on the top right corner of the transaction details, right next to the call (📞) icon

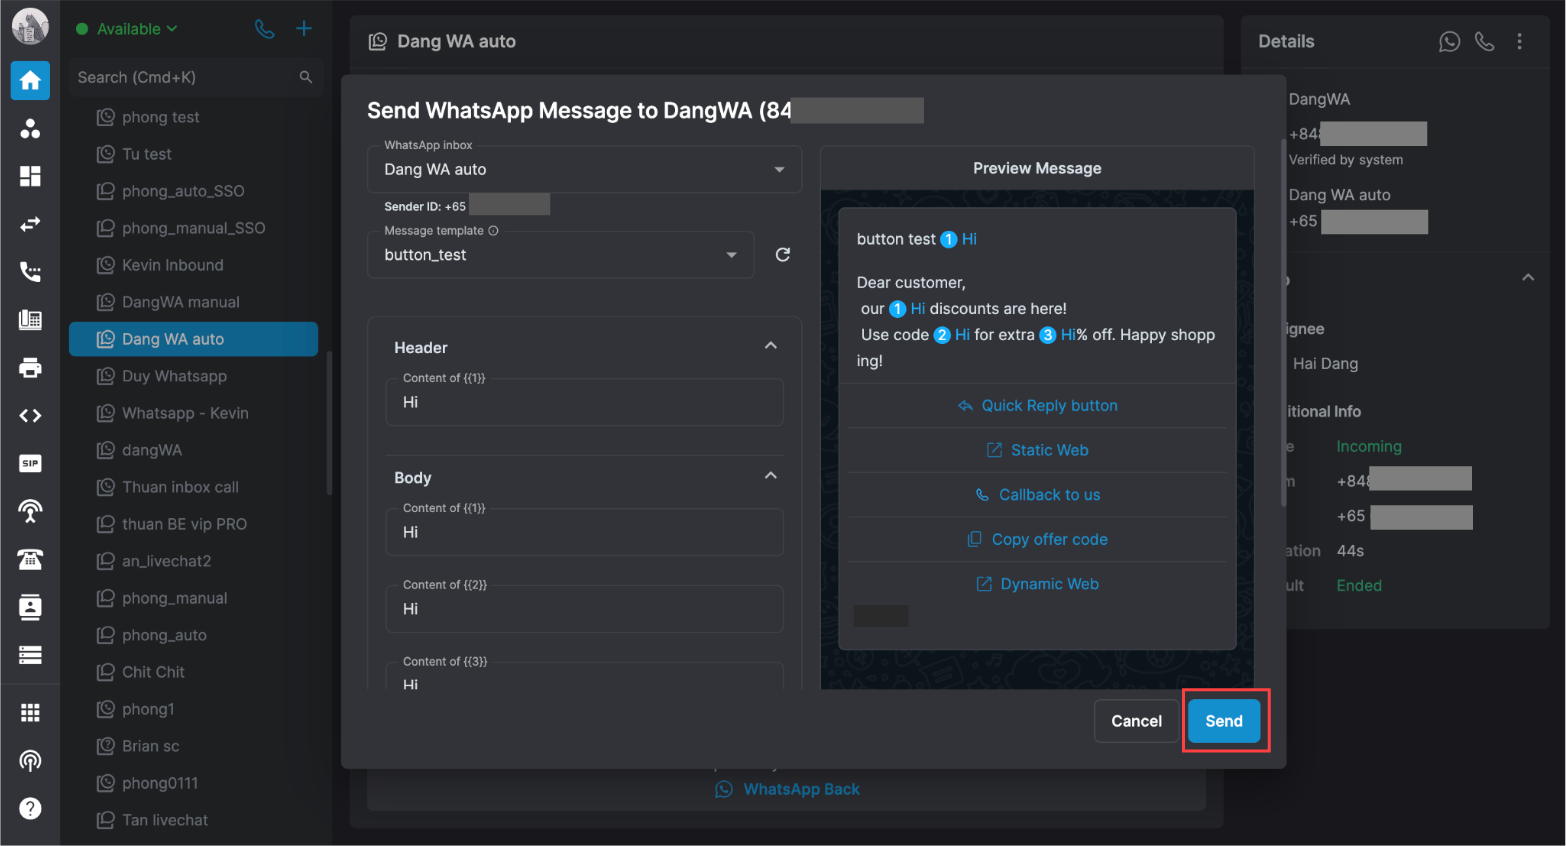
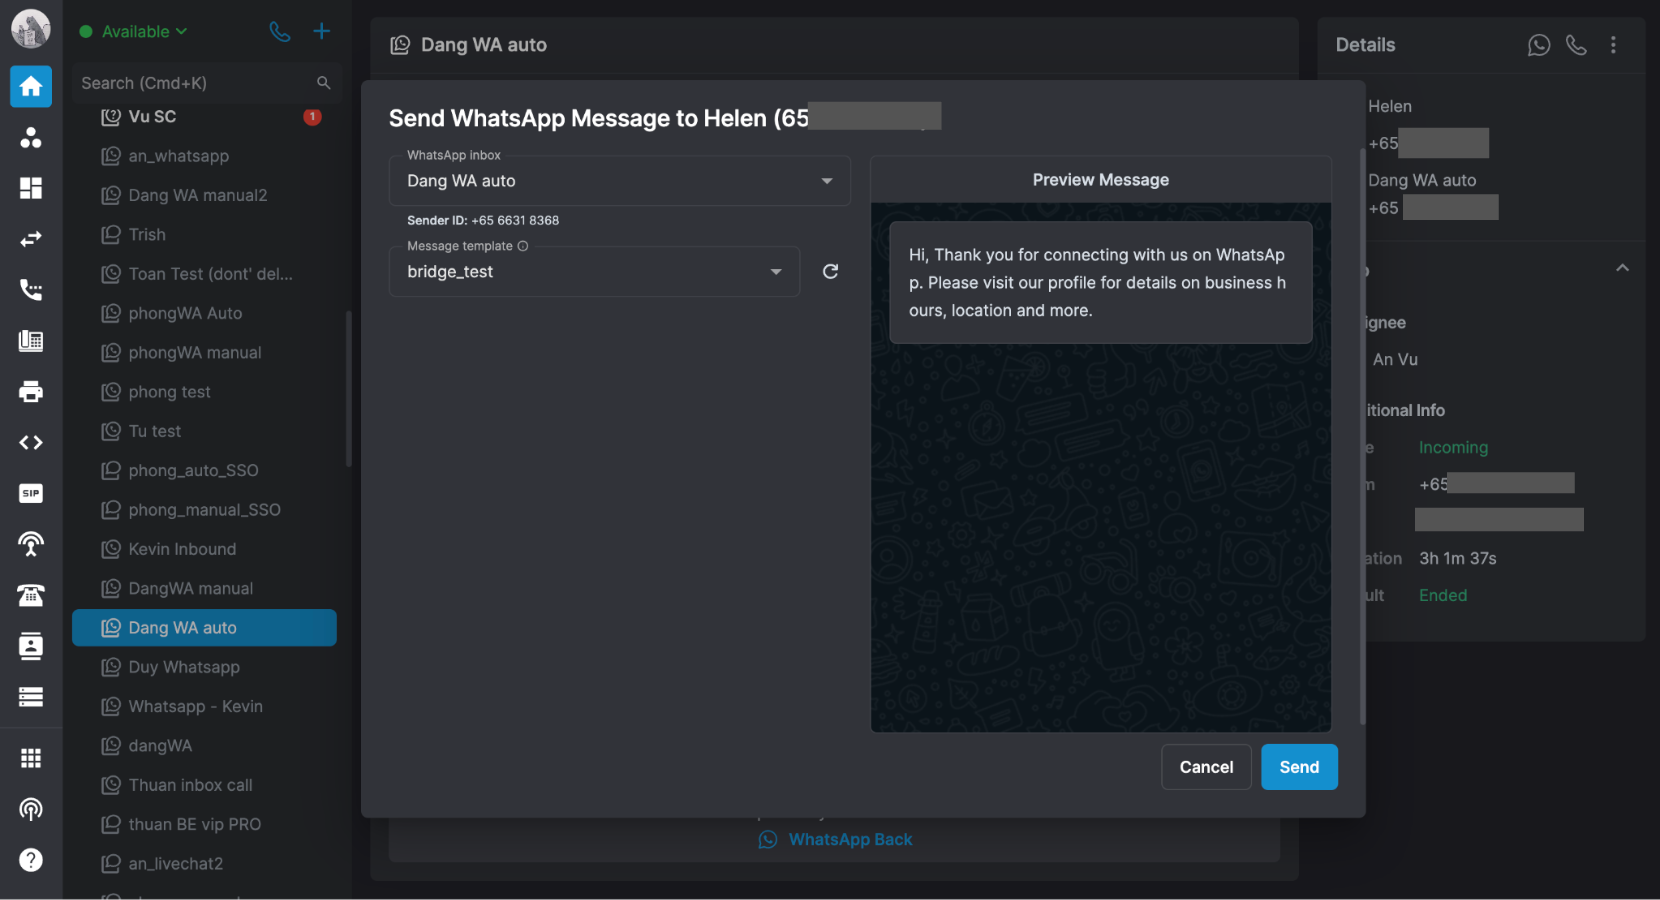
- A pop-up window will appear
- Select inbox
- Select Message template
- Input variables (if any)
- Check preview message
- Preview Message section supports the following button types:
- Quick reply buttons
- Custom
- Call-to-action buttons
- Call on WhatsApp
- Call Phone Number
- Copy offer code
- Visit website
- Static
- Dynamic
- Quick reply buttons
- Click Send

Note
Following are some right-click options for text messages and files during live chat:
-
Text Messages
- Reply (active transaction)
- Copy message
-
File
- Reply (active txn)
- Copy image (applied to image)
- Download
- Open in new tab (applied to image)

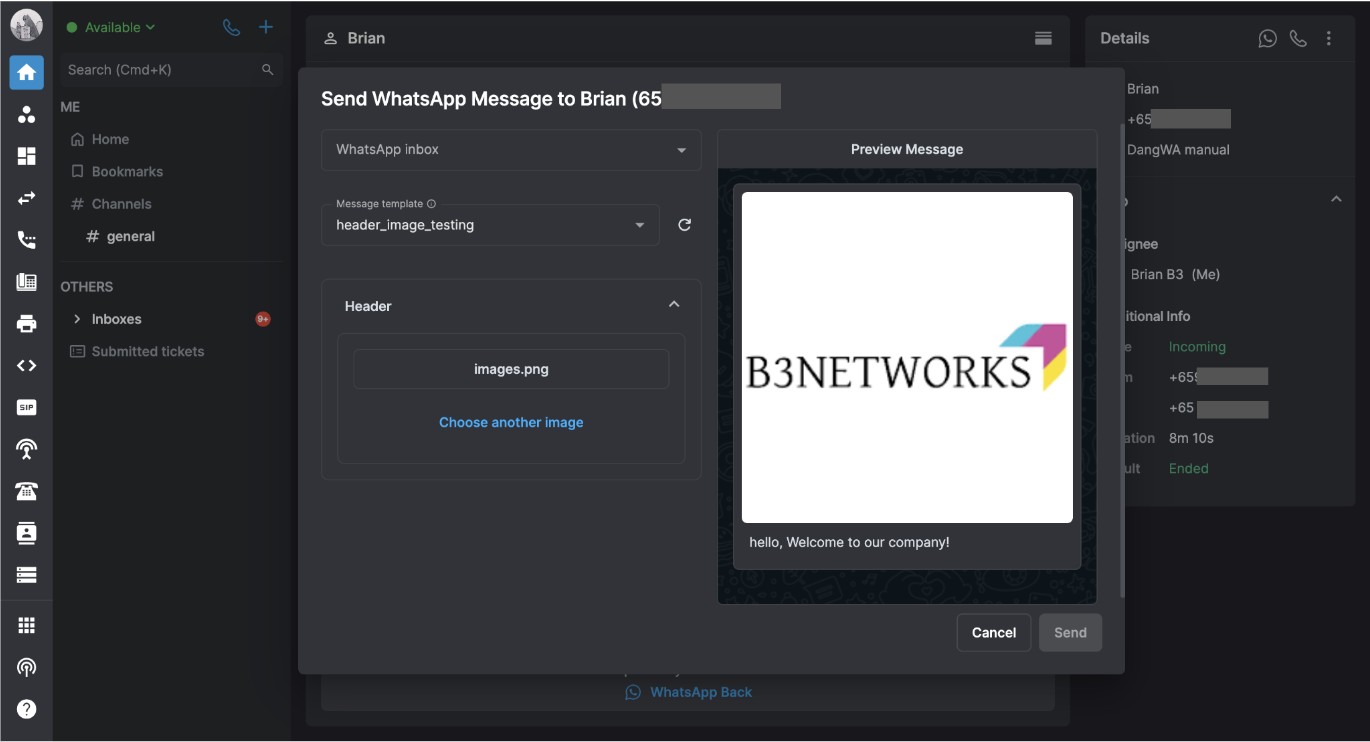
Using Media Headers in WhatsApp Templates
WhatsApp templates support headers with media types, enhancing the messaging experience. The supported media types include:
- Image
- Video
- Document (PDF format only)
Agents can upload media files directly within the message template through the portal when sending WhatsApp messages.

- The system will initiate a WhatsApp message to the customer, and the status will be marked as “Waiting.”
- The transaction will be assigned to an agent only after the customer responds to the message.
- Upon acceptance of the chat by the agent, communication with the customer will proceed as usual.

- Users are unable to initiate a “Send new WhatsApp message” action for a customer with an ongoing transaction.
- Clicking the “Send new WhatsApp message” button prompts a popup notification indicating the existence of an active transaction.
- Users have the option to click on the TXN UUID to navigate directly to the active transaction.

- When an agent triggers a "Send new WhatsApp message" , they become the designated transaction assignee, meaning they are automatically assigned to the new WhatsApp message transaction.
- To trigger a new WhatsApp message, agents must have both the Contact Center Add-on and the WhatsApp Add-on licenses assigned to them.
- Additionally, agents do not need to select an inbox when triggering a new WhatsApp message. The transactions will be directly linked to the inbox of the expired WhatsApp conversation that initiated the new WhatsApp message.

If an agent triggering a "Send new WhatsApp message" reaches their WhatsApp capacity limit, the system will prevent them from proceeding and display an error message.

Outbound WhatsApp Messages
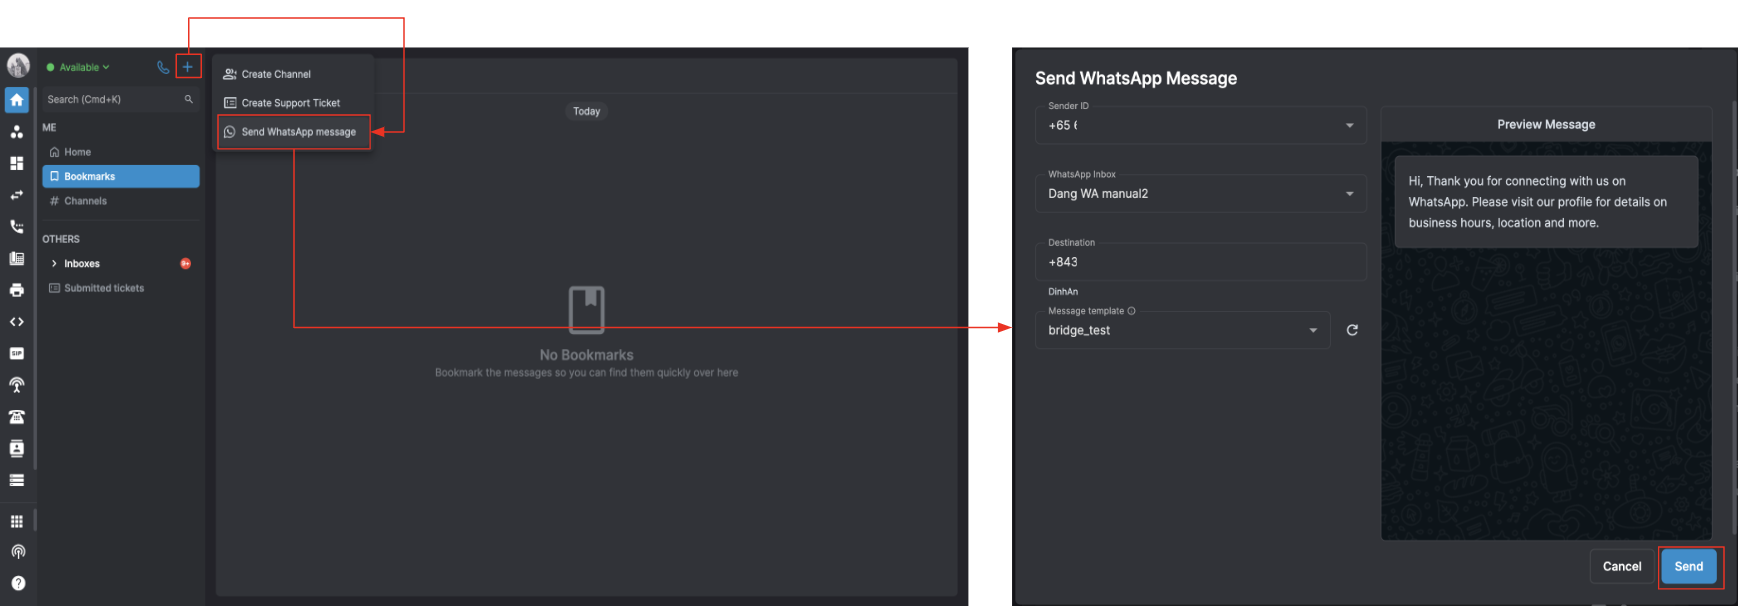
Our system also supports sending outbound WhatsApp messages to customers who have never contacted the organization. Follow these steps to send a WhatsApp message:
- Click Create
- Select Send WhatsApp message
- A “Send WhatsApp Message” popup will appear
- Select the Sender ID
- Select the WhatsApp inbox
- Select the Destination
- Select the Template
- Click Send

Note:
- To send outbound WhatsApp messages, users must have both the Contact Center and WhatsApp Add-on license assigned.
-
Select WhatsApp Inbox
- Agents can only select from their assigned WhatsApp inboxes
- The outbound transaction will be listed under the selected inbox
-
Assignee:
- The agent who triggers the outbound WhatsApp message will be the assignee of that transaction.
- If the agent has reached their capacity limit, the system will not allow them to send the WhatsApp message and will display a warning message, similar to the WhatsApp Back feature.
-
Destination WhatsApp Number:
- Saved WhatsApp numbers in Manage Contact
- Input new number
- If the destination number is not linked to a WhatsApp account, an error message will be displayed: “The message failed to be sent because the number is not linked to any WhatsApp account.”

Check WhatsApp Transaction History
- Users have the ability to review all WhatsApp transactions within the inbox, including comprehensive details for each transaction.

Note:
Supervisor can access all the inboxes, while Agent can only access their assigned inbox(es).
Export Whatsapp Chat
Users can export their WhatsApp chats by following the steps below:
- Go to My work / Inboxes
- Select Channel WhatsApp
- Search for and select a WhatsApp conversation that you want to export
- Click on the 3-dots icon
- Click Export chat

(Note: Owner + Admin have a Contact Center license, Members have Contact Center + WhatsApp license)