Create a Live Chat Inbox
-
OSS/BSS Answers
Access Control Security Hub Admin Audit B3Network Master Account Channel App Contract App Customer App Discount App Edge Server File Management Finance App Invoice App Number Management Payment Portal Settings Price List Product App Release V2 SMS Gateway Supplier App Support Center Support Hub Business Hub Sales Hub Finance Hub
- App Model - Organization Management
- App Model - Communication Apps Answers
- License Model - Organization Management
-
License Model - CPaaS Solution Answers
Phone System - Admin Guide Phone System - End-user Guide Mobile App Desktop App Web Phone Omni-Channel Auto Attendant - Admin Guide Developer Hub - Admin Guide Microsoft Teams Operator Connect - Admin Guide Microsoft Teams Direct Routing - Admin Guide Contact Center - Supervisor Guide Contact Center - Agent Guide SIP Trunk CPaaS - SIP Trunk Power SIP Trunk CPaaS Fax CPaaS Hotdesking Contact Campaign File Explorer Power Mobile App Files App Campaign App
- Telcoflow
- Integrations Answers
- Updated Regulations
- Ideas Portal
Table of Contents
Omni-Channel Configuration flow for Live Chat
Create an Inbox
Prerequisites
- Owners and Admins having Permission for Phone System can access the Inbox Management tab
- The organization must have at least 1 license for Contact Center and Live Chat each
Configuration

Agent Management
-
Assignment mode
> Auto: The chat will be automatically assigned to the available agents in the inbox. This is the default mode set by the system.
> Manual: Supervisor will manually assign the chats to his agents.
2. Reassignment timing (seconds)
> If a chat is not accepted by an agent within the reassignment time, then it needs to be reassigned.
> Default time for reassignment is 30 seconds.
3. Selecting agent to assign
> Live Chat and Contact Center add-on licenses are required by the agents to be displayed in the agent list.
Note
Hover on the info icon to view the tooltip “The assigned agent must accept the chat within this time frame” for Reassignment timing.

Note
- Agent Capacities applies to both Auto and Manual assignment mode, ensuring balanced workloads for agents regardless of the assignment mode.
- Agents will be assigned transactions precisely according to the capacities defined for them.
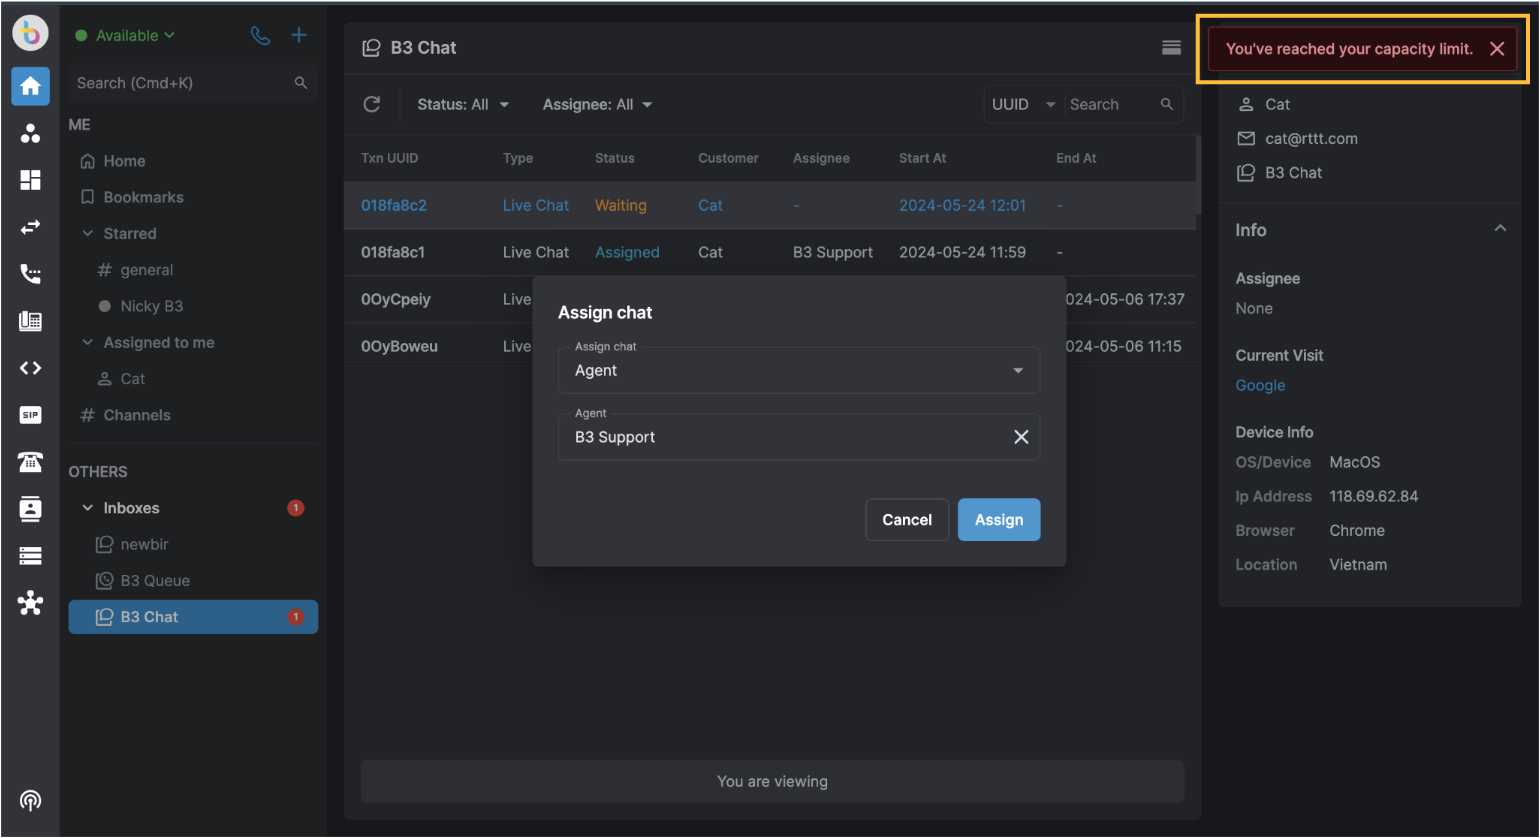
- A warning message will be displayed if an admin or agent attempts to assign more transactions than the defined capacities.

Inactivity timeout
The system offers configurable inactivity events within the Live Chat inbox, allowing users to define actions based on customer idleness. Time Out Action can be configured during the creation or editing of chat inboxes.
Users can choose from the following options for a specified inactivity period:
- Close transaction without sending a message
- Send a predefined message to the customer
- Send a message and then close the transaction automatically
Note: Message limit = maximum 200 characters
How to configure inactivity timeout
- Go to Phone System - view System
- Choose Omnichannel tab
- Choose Inbox, filter type = Live Chat
- Click on the Create button and Choose type = Live chat
- Input inbox name, and Click Create
- Click Next and Configure Agent management
- Click Next
- At Inactivity timeout toggle ON ‘Time out action’
- Input Inactivity duration (in minutes). The minutes can be input in the range = 1 to 432000
- Click on Choose action
- Choose one of the actions
- Close transaction
- Send message
- Send message and close transaction
- Input message (if needed) and Click Save
View/Edit Live Chat Settings
- Users can view/edit Inbox Name for Live Chat after creation:
- Overview


- Users can view/edit Live Chat settings after creation:
- Agent Management
- Inactivity Action

Delete an Inbox
Now users can easily delete a live chat inbox by following these steps:

Note
Once you delete an inbox, the chat widget will be deactivated as well. It can ONLY be reactivated if the widget was temporarily disabled. The ability to reactivate the chat widget is removed when an inbox is deleted.
Canned Response - User level
A canned response is a predefined message that live chat operators can send in response to the most frequently asked questions from the customers. It is a feature that allows operators to send one-click replies in seconds without having to type a message repeatedly.
Configuration
- Users can create personalized responses for their own use.

Canned Response - Organization level
Configuration
- Users can create canned responses for the whole organization.
