Outbound Call Center - Number List

Written by B3Networks Academy
Updated at August 29th, 2024
-
OSS/BSS Answers
Access Control Security Hub Admin Audit B3Network Master Account Channel App Contract App Customer App Discount App Edge Server File Management Finance App Invoice App Number Management Payment Portal Settings Price List Product App Release V2 SMS Gateway Supplier App Support Center Support Hub Business Hub Sales Hub Finance Hub
- App Model - Organization Management
- App Model - Communication Apps Answers
- License Model - Organization Management
-
License Model - CPaaS Solution Answers
Phone System - Admin Guide Phone System - End-user Guide Mobile App Desktop App Web Phone Omni-Channel Auto Attendant - Admin Guide Developer Hub - Admin Guide Microsoft Teams Operator Connect - Admin Guide Microsoft Teams Direct Routing - Admin Guide Contact Center - Supervisor Guide Contact Center - Agent Guide SIP Trunk CPaaS - SIP Trunk Power SIP Trunk CPaaS Fax CPaaS Hotdesking Contact Campaign File Explorer Power Mobile App Files App Campaign App
- Telcoflow
- Integrations Answers
- Updated Regulations
- Ideas Portal
Table of Contents
The list of number is required when you want to use the Outbound call feature of Wallboard.
In order to create a number list, follow the steps below:
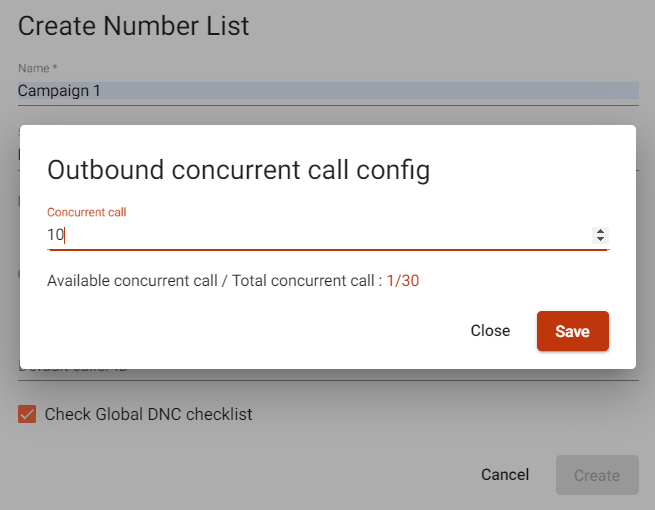
1. Configure outbound concurrent calls for the assigned queue:
In order to configure outbound concurrent calls for the assigned queue, go to Queue Management > Settings > Outbound concurrent call config:
Notes:
- The number of outbound concurrent calls allowed per organization is limited to thirty (30).
- If you have not created a queue yet, please follow this link for the instruction.
2. Add a number list:
As the feature is available in Outbound only, you need to go to Workspace > Switch to Outbound in order to seethe Number List tab
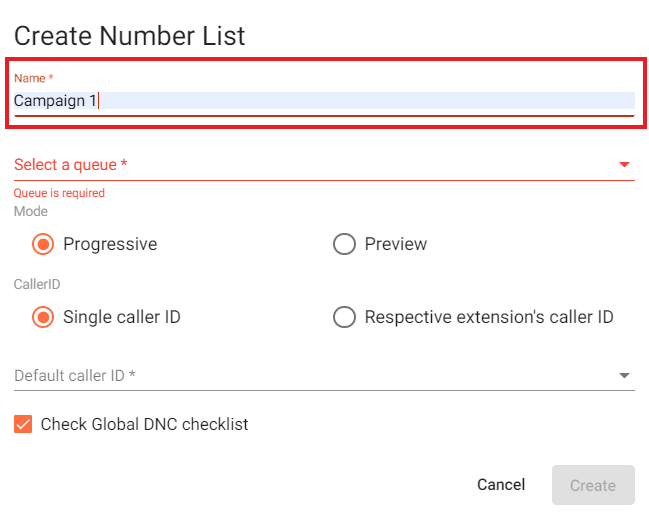
- Go to Number List tab > click Create Number List:

- Give the list a name:
- Select Queue handling this campaign > check/edit the queue's number of outbound concurrent calls (already configured at step 1) > Save:
- Choose Mode of the campaign:
- Progressive: the numbers will be assigned to the agents in the queue automatically.
-
Preview: for every number that is assigned to the agent, the system will display a popup to the agent with the caller info. The agent will decide whether she wants to proceed with the call.
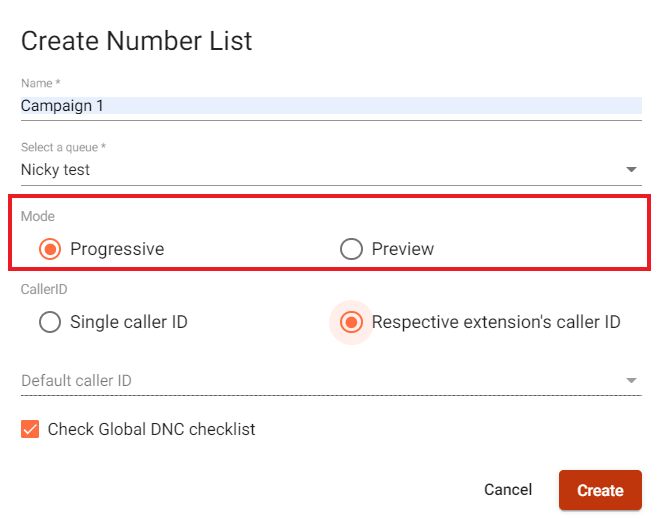
- Select CallerID:
- Single DID: all outbound calls will take the chosen number as their default caller ID.
-
Respective extension's caller ID: caller ID is defined as per each extension settings. The default caller ID is used when the extension does not have any caller ID settings.
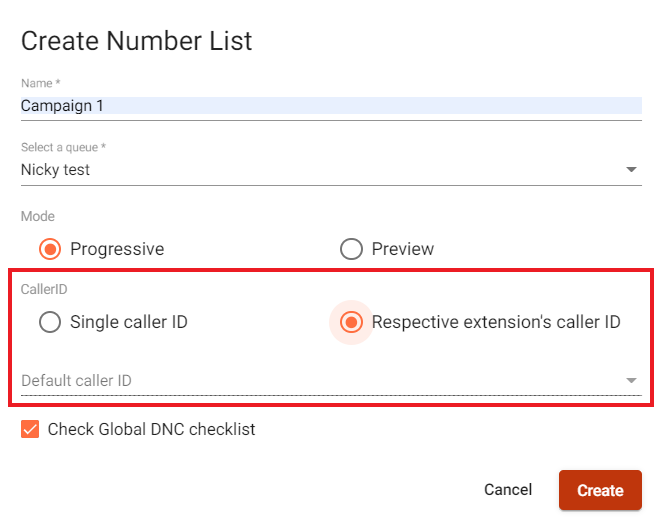
- Toggle to check DNC and company blacklist (optional) > Create:

A new list is created with status: Draft.
3. Add numbers to the list:
The maximum number for 1 campaign is 50,000 numbers.
- Click View Details:
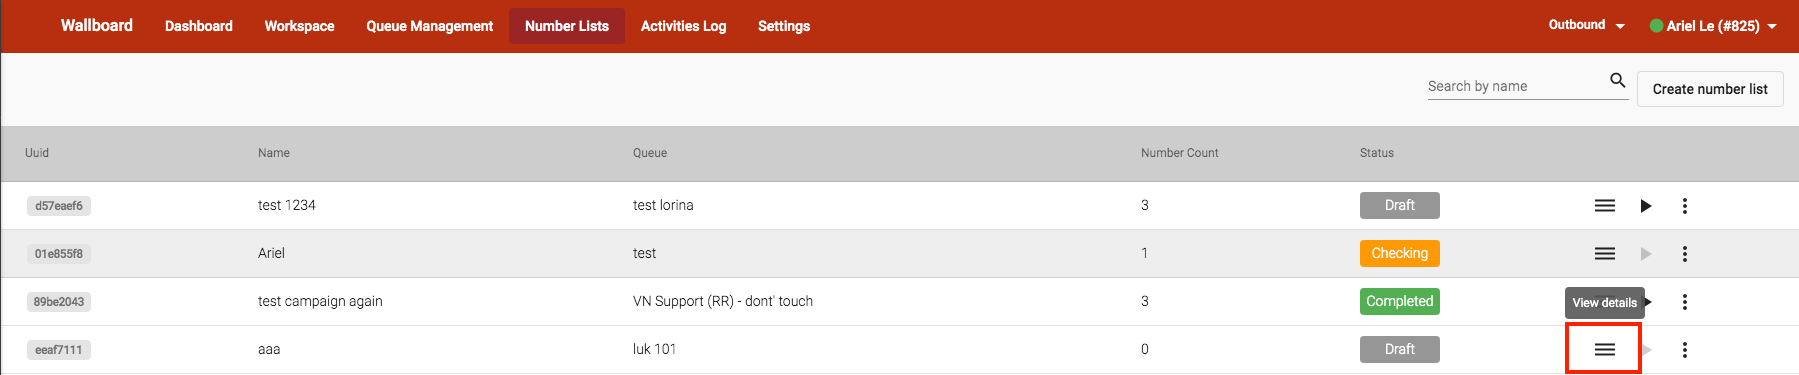
- Click Upload. If you are uploading the numbers the first time, you can refer to the sample as attached:

- When the list is successfully uploaded, the numbers are displayed as below:
4. Check DNC:
After the numbers are loaded in, you can start the campaign.
- If you have an active Global DNC subscription, you may choose whether you want to do bulk filtering for all numbers in advance or start the campaign right away when you create a campaign.

- If you enable Check Global DNC checklist option, please follow the steps below to check DNC for your number list:
- Click on the magnifying glass icon > Check > the campaign status will be changed to Checking:
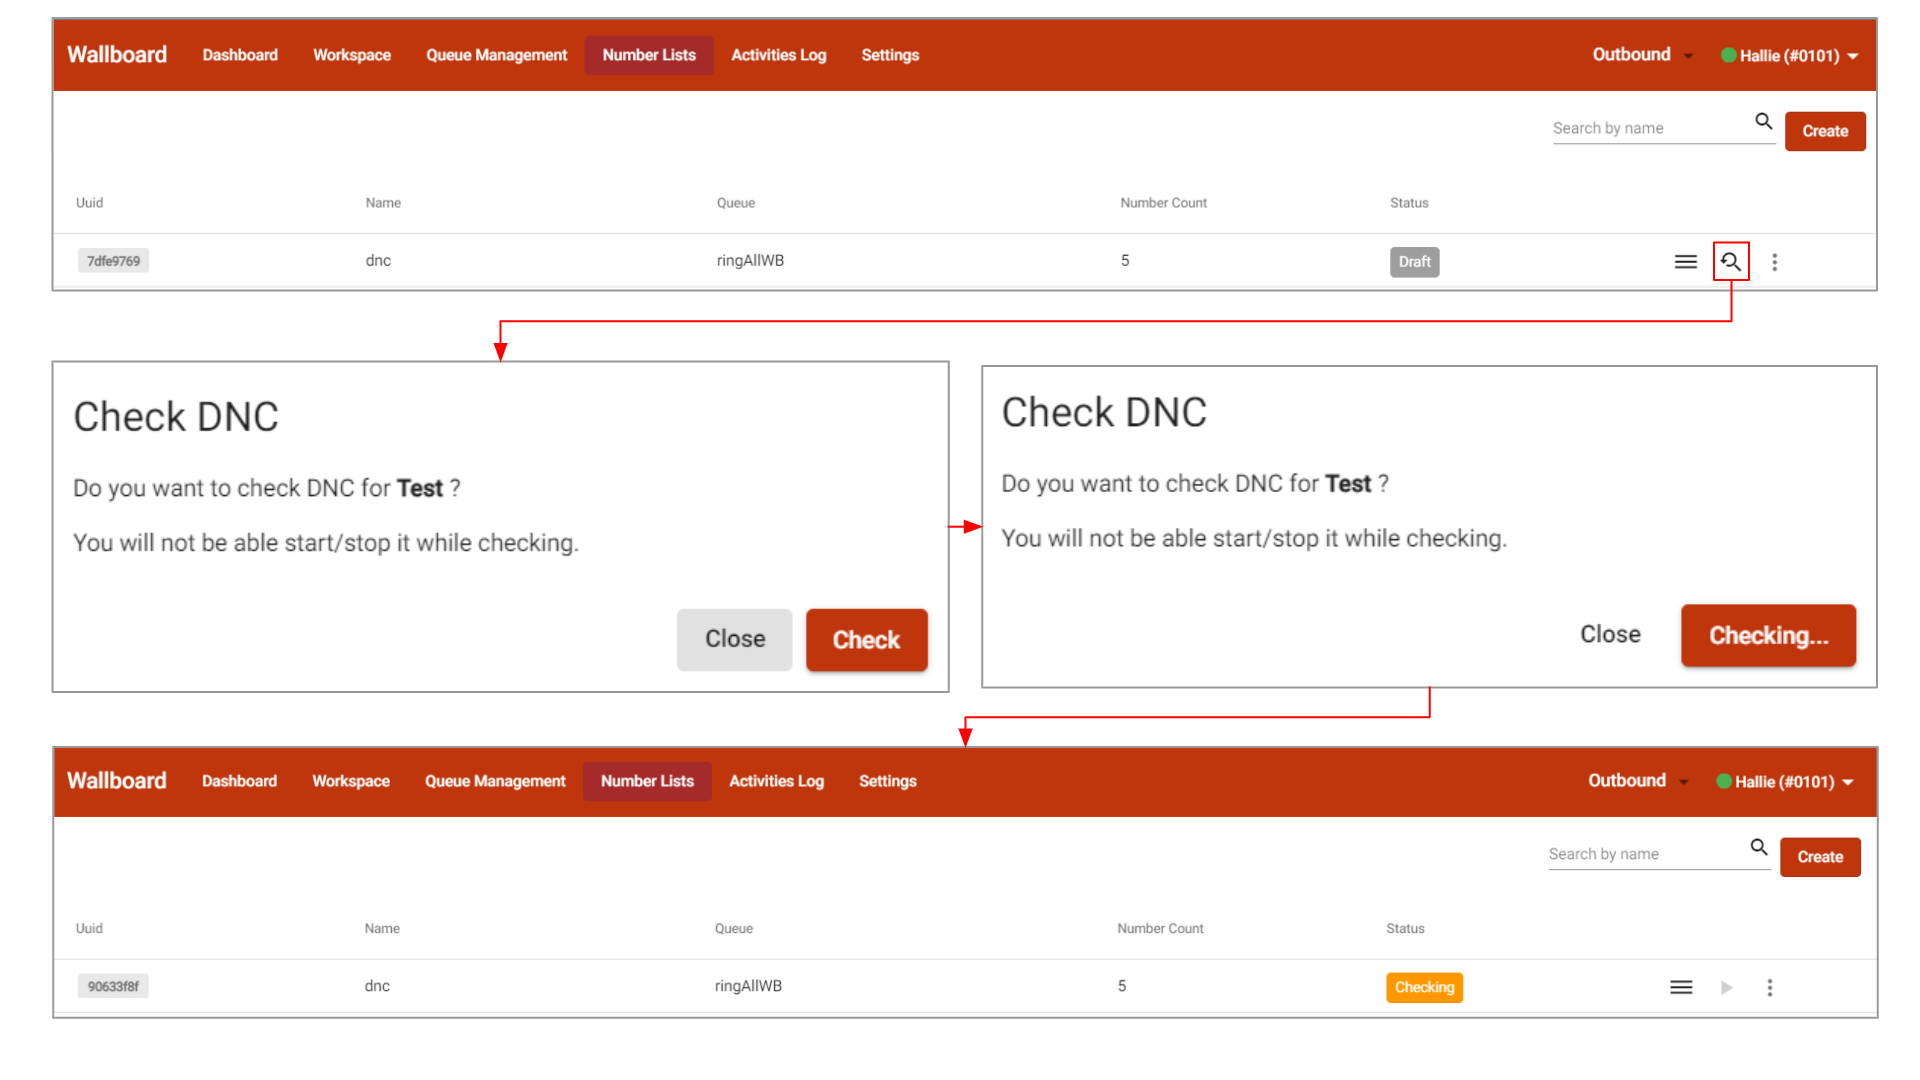
- Once the system finishes checking your number list, the campaign status will be changed to Ready, you now can start a campaign anytime.
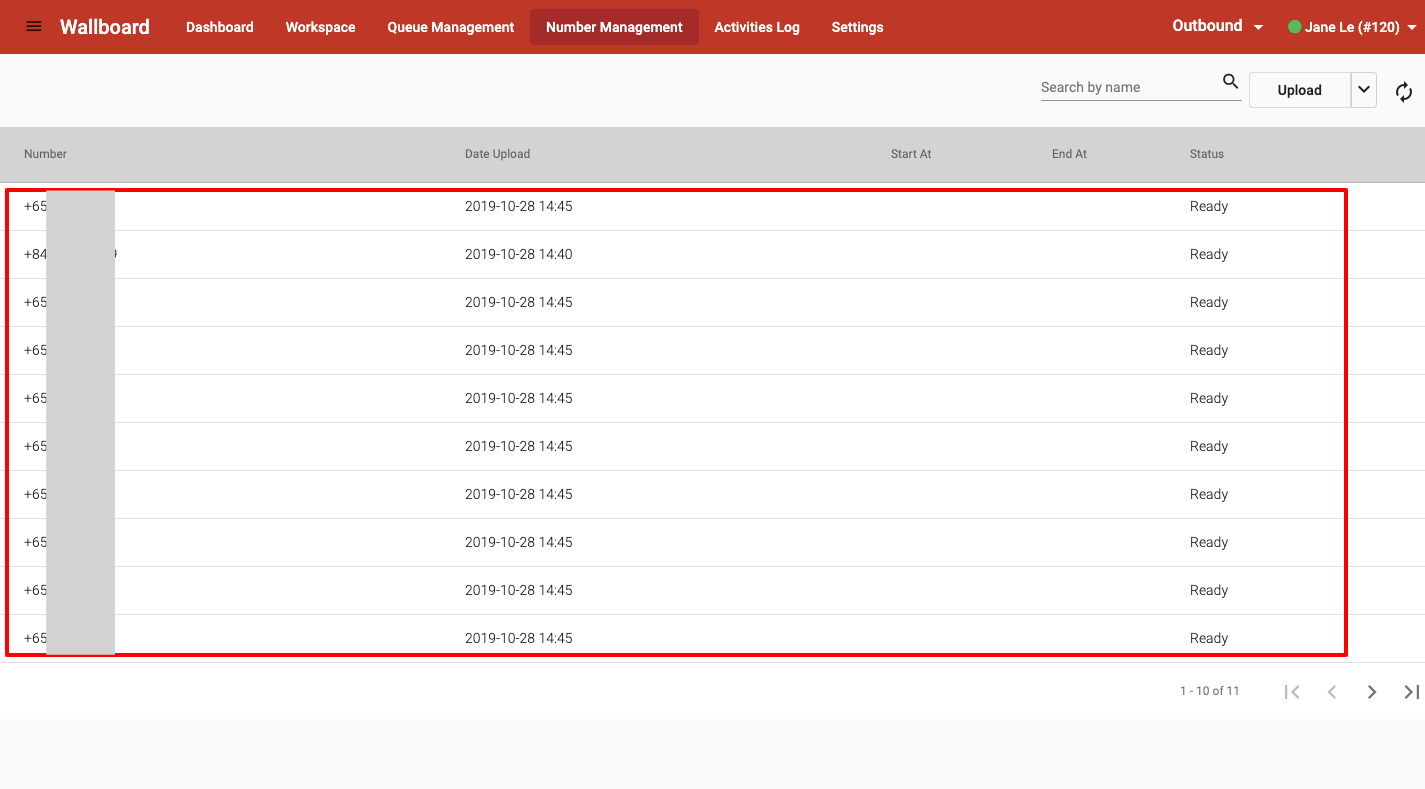
- Click on the dashes icon to check the details.
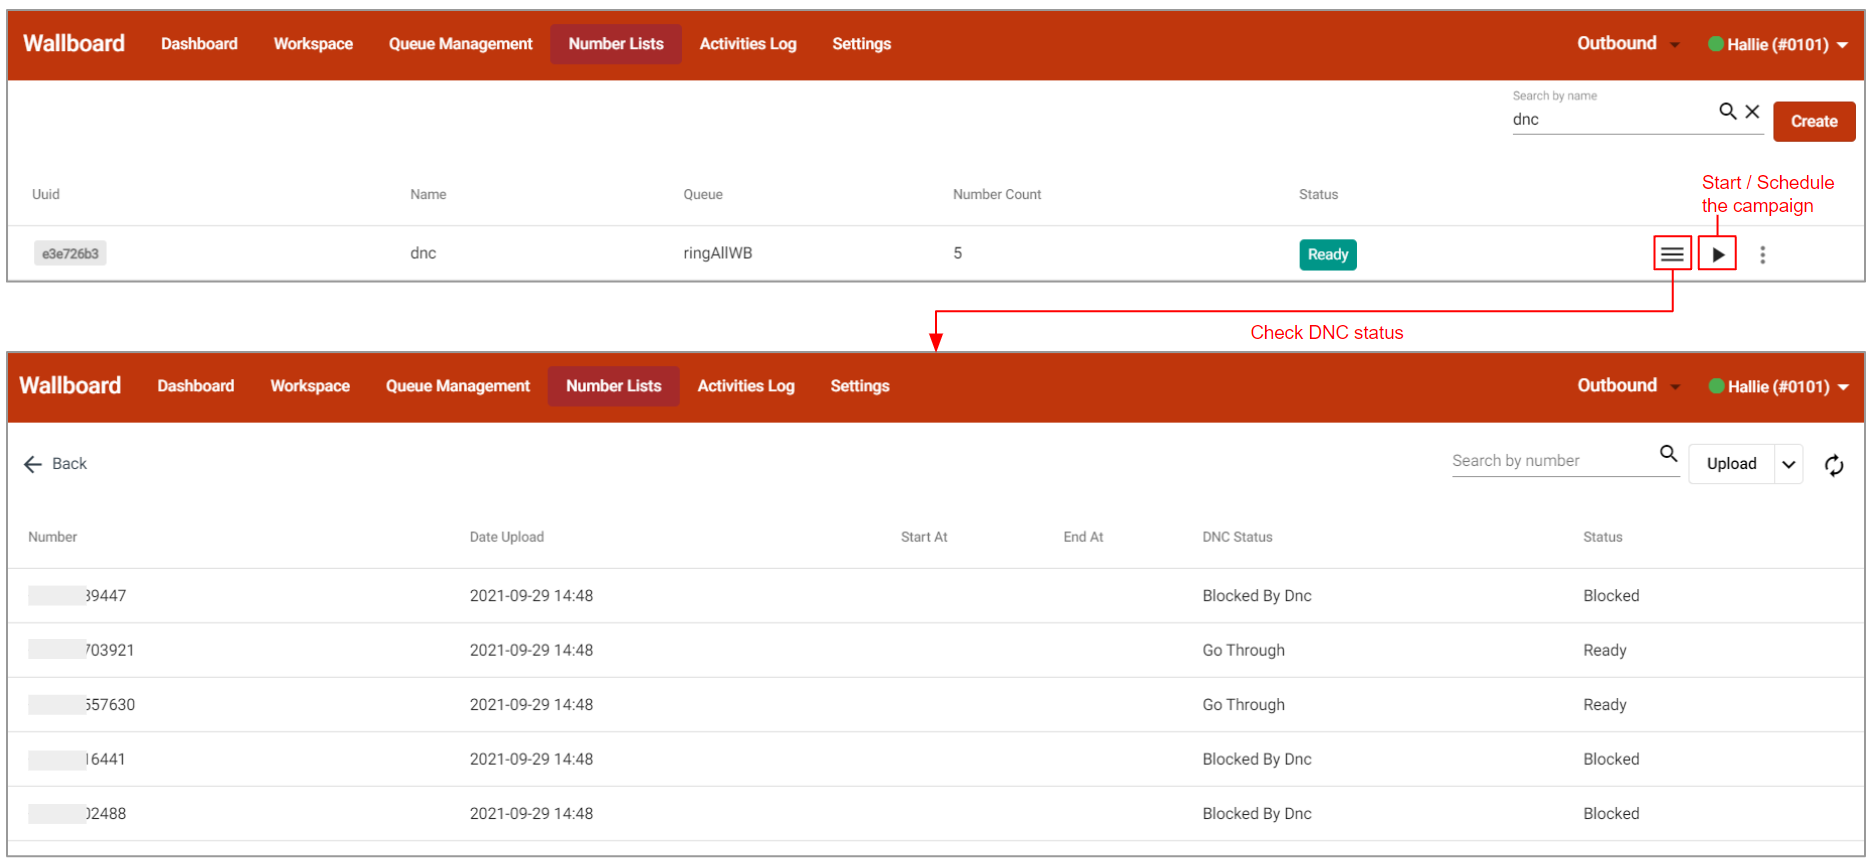
- Click on the dashes icon to check the details.
- Click on the magnifying glass icon > Check > the campaign status will be changed to Checking:
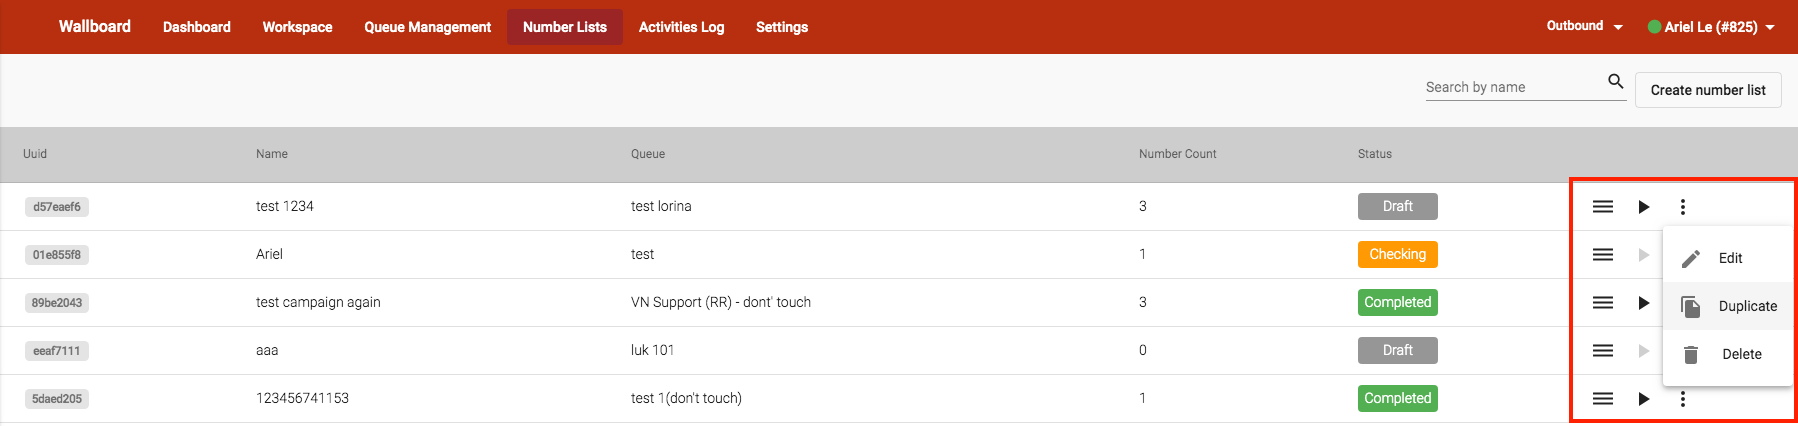
5. Other available actions:
- Edit the basic info of a list (name, callerID), change the Mode, or change the queue.
- Duplicate a list, with or without the numbers.
- Delete a list.
Demonstration:
Without DNC Checking:

With DNC Checking: